

Introduction to This Lavash Bread Recipe Guide
Bread-making is more than a culinary art—it’s a story woven into every culture. Lavash, a soft, thin flatbread hailing from Armenia and beloved across the Middle East, is one such story you can literally taste. Traditionally baked in a tonir (clay oven), lavash is now easily made at home with just a handful of pantry staples and a bit of kneading love.
In this ultimate guide, I’ll walk you through every single step—yep, I’ve done it myself and learned a lot along the way. From the ingredients you’ll need, all the way to creative serving ideas, you’ll uncover not only a delightful lavash bread recipe but also the cultural and practical wisdom that makes this flatbread so special.
Grab your flour, roll up those sleeves, and let’s dive in.
Part 1: What is Lavash Bread?
The Origins of Lavash Bread
Let’s travel for a moment—no passport required—to the caucasus mountains and the kitchens of Armenia. That’s where lavash bread finds its roots. Traditionally prepared in underground clay ovens called tonirs, lavash has been a staple of daily life and festive occasions alike for generations.
This thin, soft, and versatile flatbread was inscribed in 2014 on the UNESCO Representative List of the Intangible Cultural Heritage of Humanity. That recognition didn’t just come because it tastes amazing—it’s about how lavash brings people together. In Armenian households, it’s often a communal task, rolled out and baked by several generations working side-by-side.
Whether used to wrap up grilled kebabs, scoop up hummus, or simply eaten plain, lavash isn’t just bread. It’s a piece of cultural heritage on a plate.
Tip: If you’re someone who loves culinary travel from your own kitchen, lavash offers a flavorful detour into Middle Eastern and Mediterranean traditions.
Lavash Bread vs. Other Flatbreads
At first glance, lavash might remind you of other flatbreads—pita, naan, tortilla. But here’s where it carves its unique niche.
- Lavash vs. Pita: While pita is puffed and forms a pocket, lavash remains thin and pliable, sometimes even cracker-crisp if left out to dry.
- Lavash vs. Naan: Naan is thick, leavened with yogurt and sometimes enriched with milk or eggs, while lavash is typically lean and thin.
- Lavash vs. Tortilla: Tortillas are usually made from corn or wheat, often using fat like lard or oil. Lavash is simpler—just flour, water, yeast, and salt, though sesame or poppy seeds are sometimes added.
Each flatbread has its charm, but lavash strikes a magical balance: easy to fold, light to bite, and incredibly versatile.
Cultural Significance of Lavash
One of the most beautiful aspects of lavash is its role in ceremonies and everyday life alike. It symbolizes abundance and unity. In Armenian weddings, lavash is draped over the shoulders of newlyweds to bless them with fertility and prosperity.
In households across Turkey, Iran, and the Levant, lavash is baked daily or weekly and used as a wrapper, a plate, or even as a spoon. Sometimes, you’ll even find families drying it on linen outside, stacking them like papery scrolls for later use.
So yes, while lavash is “just bread,” it carries more meaning than you’d imagine. It’s warmth. It’s memory. It’s tradition.
For more on lavash’s heritage and how it fits into regional diets, you can explore this excellent cultural overview on Epicurious.
Why You Should Make Lavash at Home
So, why not just grab lavash from the store? Here’s the thing—store-bought lavash often lacks that chewy-soft texture or that satisfying slight char that you get from homemade bread. Making it at home lets you:
- Control the ingredients (goodbye, preservatives)
- Customize the shape, size, and softness
- Enjoy the incredibly therapeutic experience of kneading and rolling
And truth be told? It’s just fun. Few things are more satisfying than pulling a warm, flexible, golden lavash off the skillet and watching it puff up like a proud little cloud.
P.S. Even if you’re new to bread-making, lavash is wonderfully forgiving—and it doesn’t require a fancy oven or exotic tools.
Part 3: Step-by-Step Lavash Bread Recipe
Mastering lavash bread begins with understanding the process from the very first bubble of yeast to the final stack of warm, soft rounds. The beauty of this recipe is its simplicity—yet, as always, the magic lies in the method. Below, you’ll find a foolproof, hands-on guide inspired by my own time in the kitchen and some solid advice from sources like The Caspian Chef and Unicorns in the Kitchen.
Preparing the Dough
Activating the Yeast
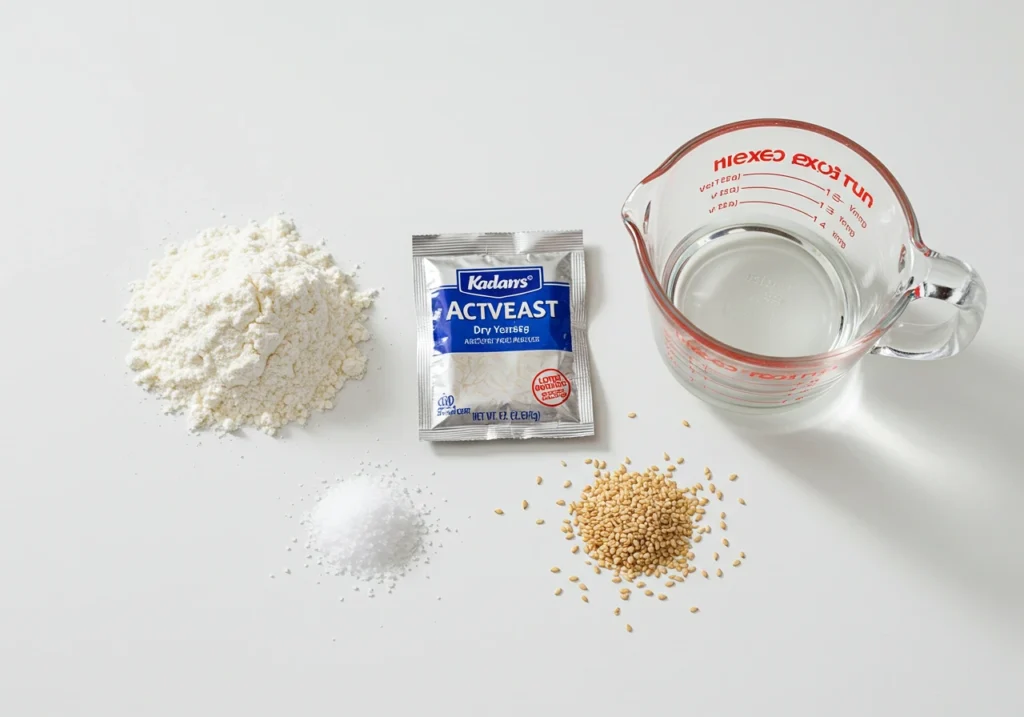
Alright, let’s kick things off with some science—that tasty kind. Begin by combining 1 packet of active dry yeast (around 2¼ tsp) with ½ cup of warm water and a pinch of sugar. Let it sit for about 10 minutes until it gets all foamy and bubbly on top.
If your yeast doesn’t activate (i.e., no foam), don’t even think about moving on. Toss it out and start again. That foamy bloom? It’s the green light for gluten magic ahead.
Mixing and Kneading Techniques
Once your yeast is awake, stir it into a larger bowl with:
- 3½ cups all-purpose flour
- 1 tsp salt
- ¾ cup warm water
- 1 tbsp olive oil (optional for a softer dough)
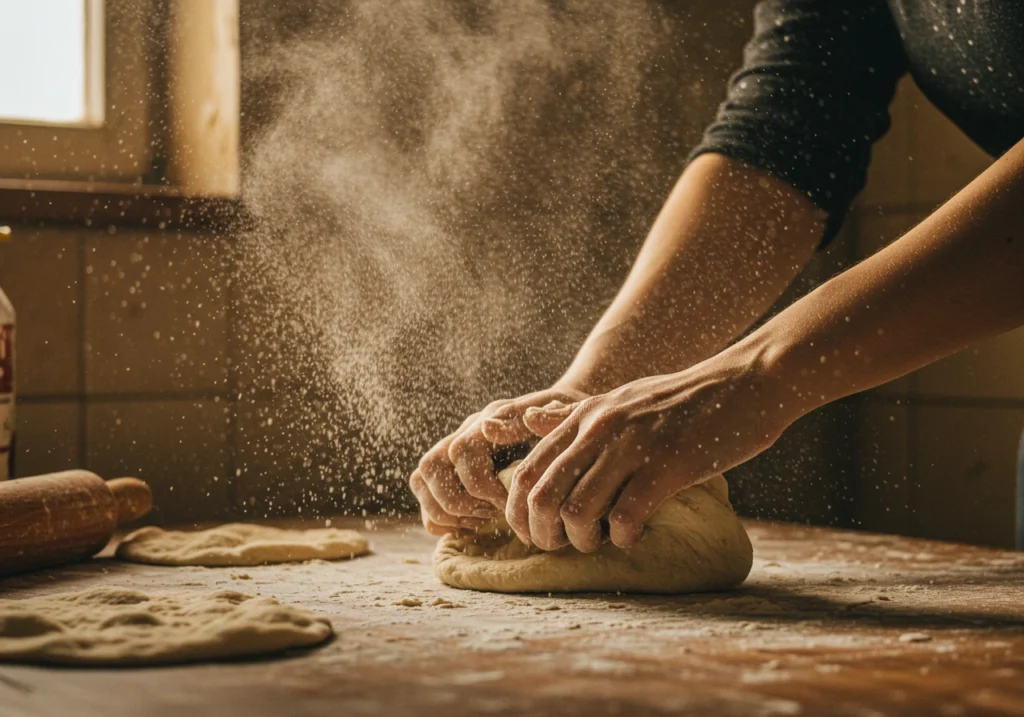
Start mixing with a wooden spoon or your hands until it forms a rough dough. Now for the muscle work—knead on a floured surface for 8–10 minutes. The dough should be soft but not sticky.
I’ve tried it both by hand and in a stand mixer. Honestly? Both work, but kneading by hand really connects you to the process.
Tip: The dough should be elastic and slightly tacky. If it’s too dry, add a teaspoon of water at a time. Too wet? Sprinkle in a bit more flour—sparingly!
Proofing and Resting
First Rise: Duration and Ideal Conditions
Place the dough in a lightly oiled bowl, cover with a clean kitchen towel, and let it rise for 60 to 90 minutes in a warm, draft-free spot. The dough should double in size—this means the yeast has done its job.
If your kitchen’s cold, here’s a hack: turn on your oven for 2 minutes, then turn it off and place the bowl inside with the oven light on. Works like a charm!
Shaping the Dough into Balls
After the dough has puffed up beautifully, punch it down gently. Divide into 8 equal portions and shape each into a smooth ball. Let them rest under a damp towel for about 20 minutes. This mini-nap gives the gluten a chance to chill out, making rolling easier later.
Second Rest: Why It Matters
Skipping this rest? Big mistake. The dough balls become stubborn and shrink back when you try to roll them. That gluten needs this downtime to become pliable and relaxed—just like we all do.
Rolling and Shaping the Lavash
Techniques for Rolling the Dough Thinly
Here’s the fun part—rolling! On a floured surface, take one dough ball and roll it out using a rolling pin. Aim for paper-thin, like tortilla-thin, without tearing. You’re not making pizza here—this is lavash, and thin is the name of the game.
Don’t be shy—roll from the center outward, rotating the dough as you go. Use your palm as a guide to keep it even.
Achieving Traditional Lavash Dimensions
Traditionally, lavash is large—up to 2 feet wide—but for a home kitchen, 10 to 12 inches does the trick. Oval or circular, it’s up to you. Honestly, mine turned out a bit rustic, but that just adds charm.
From Natasha’s Baking to The Daring Gourmet, everyone agrees: don’t obsess over perfect circles. Go for character and stretch.
Preventing Dough from Sticking
Dusting is key—but not too much! Use a light hand with flour and rotate the dough often. A silicone mat or a wooden board can also help. If it sticks, you’re either too light on flour or too heavy on pressure.
Pro tip: A light sprinkle of semolina flour adds a nice texture and helps avoid sticking too.
Cooking Methods
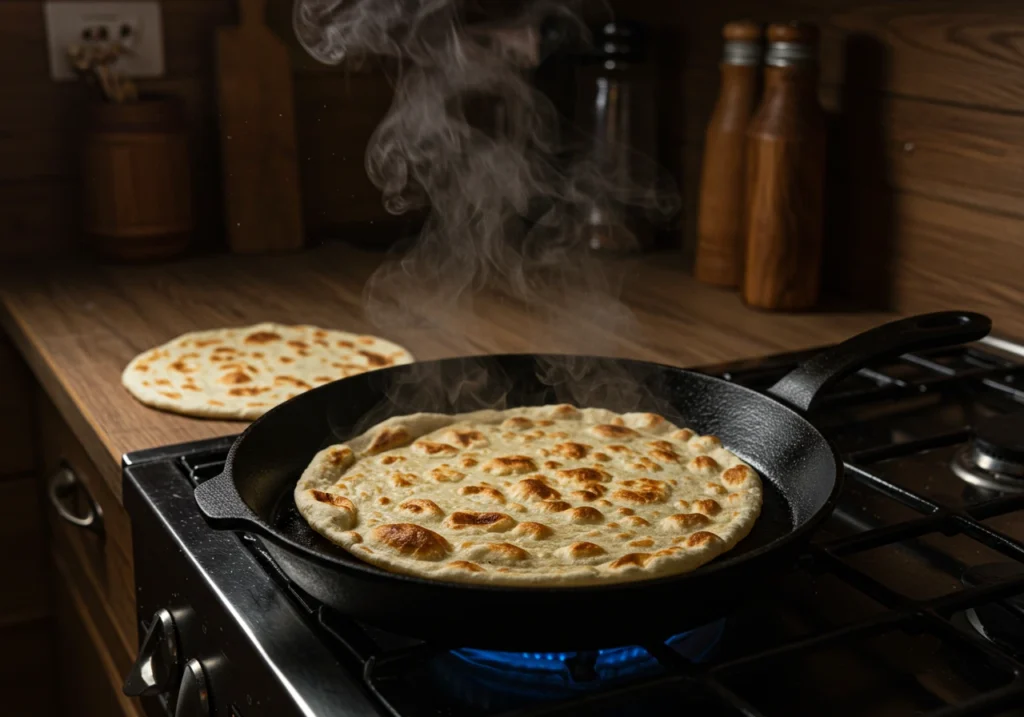
Stovetop Cooking: Skillet or Griddle
Heat a dry cast iron skillet or griddle on medium-high until hot. Lay your rolled dough gently on the surface. Cook for about 1–2 minutes per side. You’ll see air bubbles form and golden spots appear—just what we want!
No oil. No flipping obsession. Let it puff, then flip once.
Oven Baking: Pizza Stone Style
Preheat your oven with a pizza stone to 500°F (260°C). Once hot, place your rolled dough on the stone using a pizza peel or flat tray. Bake for 1–2 minutes, until lightly browned and slightly crisp around the edges.
This mimics the traditional tonir oven pretty well, and it’s great when making a larger batch.
Alternative Methods: Inverted Wok Technique
Here’s a genius method from Epicurious: Flip a wok upside down over a gas flame. Lay your dough over the hot dome and watch it blister beautifully!
It’s theatrical and effective—plus it saves oven time. Highly recommended for small kitchens!
Cooling and Storing Lavash
Proper Cooling Techniques to Maintain Softness
Once cooked, stack your lavash on a plate and cover immediately with a clean towel. This traps steam and keeps them flexible. Skip this step and they’ll crisp up before you blink.
Storage Tips: Short-Term and Long-Term
For short-term storage (1–2 days), wrap in foil or a resealable bag and keep at room temp. For longer storage, stack with parchment paper between, seal tightly, and freeze for up to a month.
Reheat in a skillet or microwave wrapped in a damp towel to restore that signature softness.
Reheating Methods for Best Results
- Microwave (10–15 sec) with a damp paper towel
- Skillet (30 sec per side) covered
- Oven (wrapped in foil at 300°F for 5–7 mins)
Whatever method you choose, aim to reintroduce moisture and warmth without drying it out.
Part 4: Serving Suggestions and Variations
Once you’ve cooked up your soft, golden lavash, the fun really begins. One of the best things about this traditional Armenian flatbread is how versatile it is. Whether you want to keep it classic or explore some quirky, crowd-pleasing twists, lavash bread is the perfect canvas.
Traditional Serving Ideas
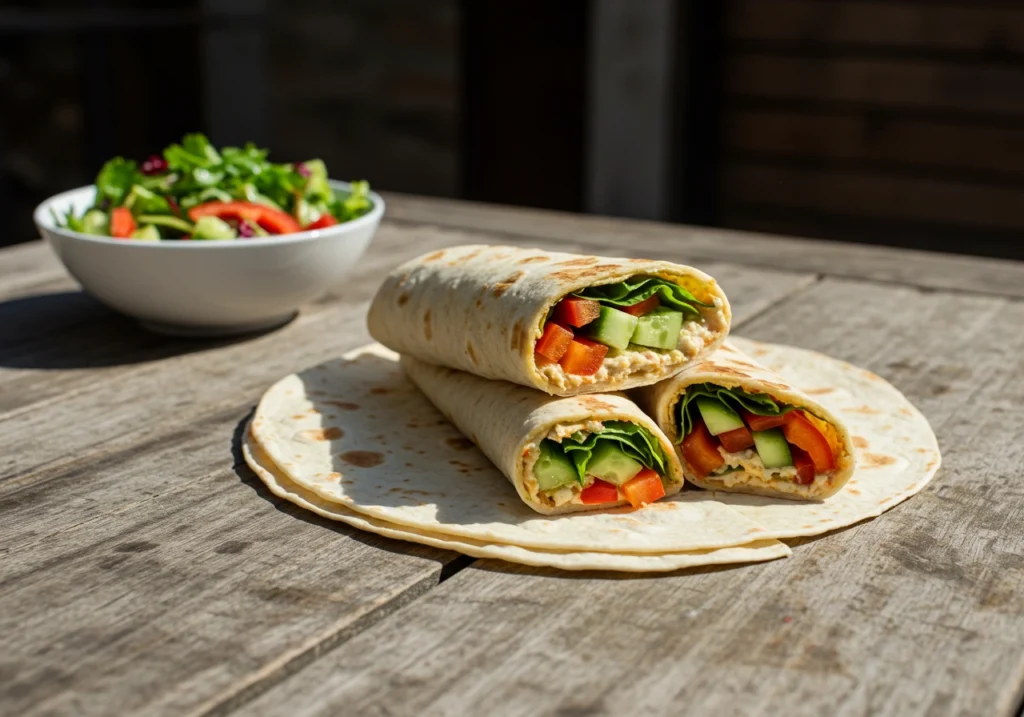
Wrap It Like a Pro
Let’s start with the timeless classic—lavash wraps. Use them to roll up grilled chicken, lamb kebabs, or even fresh falafel. Add a dash of sumac, a few pickles, and a drizzle of yogurt tahini sauce, and you’re instantly transported to a vibrant Middle Eastern bazaar.
Lavash is ideal for wraps because it’s pliable, light, and strong enough to hold generous fillings without breaking apart. It’s honestly hard to beat.
Perfect Pairings: Dips and Mezze
Not in the mood to wrap? Tear your lavash into strips and serve it warm alongside bold dips like:
- Creamy hummus
- Smoky baba ganoush
- Spicy muhammara or labneh with za’atar
According to Serious Eats, lavash is the ideal scoop. It soaks up flavor while offering just enough chew and structure.
Soup and Stew’s Best Friend
Don’t overlook lavash’s role as a hearty, rustic companion to stews and soups. Fold or rip a piece and dip it into a bowl of lentil soup or beef stew—it’s the kind of comfort food you didn’t know you needed.
Even Epicurious has spotlighted lavash as an underrated but brilliant bread to serve with your next slow-simmered meal.
Whether soft or crisp, lavash adapts beautifully to any savory moment—always stealing the spotlight without trying too hard.
Creative Uses for Lavash Bread
Crispy Lavash Chips
Here’s a snack-worthy twist—turn your lavash into crispy chips. Simply brush it with olive oil, sprinkle with sea salt, paprika, or za’atar, and bake at 375°F (190°C) for 6–8 minutes. Cut it into triangles or strips before baking, and bam!—you’ve got homemade crackers.
They’re perfect with salsa, cheese spreads, or that same hummus we just talked about. Light, airy, and oh-so-snackable.
Lavash Pizza: A Quick Fix with Big Flavor
When I first tried lavash pizza, it was purely out of curiosity—and now I make it weekly. Just lay a piece of lavash on a baking tray, brush with tomato sauce, sprinkle with cheese, and load up your toppings.
Bake at 400°F (204°C) for 8–10 minutes until crispy and bubbly. What you get is a cracker-thin, gloriously cheesy flatbread pizza that’s ready in a snap.
It’s a game-changer for busy weeknights or when guests pop over unexpectedly.
Dessert Lavash? Yes, Please!
Bet you didn’t see this one coming—lavash for dessert. Spread a soft layer of cream cheese or Nutella, top with berries, banana slices, or chopped nuts, and finish with a drizzle of honey or chocolate syrup.
Want a crispy twist? Bake the lavash with cinnamon sugar before adding sweet toppings. Think of it as Middle Eastern meets French crêpe vibes, and yes, it’s totally addictive.
This one’s especially fun for kids or when you want to impress without spending hours baking.
Part 5: Tips and Troubleshooting
Let’s face it—homemade lavash isn’t difficult, but like anything involving dough, a few hiccups can sneak in. Sometimes, it puffs like a dream, and other times it turns into a chewy, undercooked mess. Trust me, I’ve been there. But with a few smart moves and common pitfalls to avoid, your lavash will turn out consistently fabulous every single time.
Common Mistakes to Avoid
Overproofing or Underproofing the Dough
One of the most sneaky saboteurs in lavash-making is misjudging the rise. If your dough overproofs, it becomes fragile and lacks that nice elastic bounce. Underproof it, and it ends up too dense to roll thin—resulting in a stiff, chewy bread. Aim for a rise that doubles the dough in size—nothing more, nothing less.
Rolling the Dough Too Thick or Too Thin
Too thick? It won’t cook evenly. Too thin? It’ll tear or become brittle. Aim for a goldilocks roll: thin enough to be flexible but not transparent. Most pros, like those on Reddit’s r/Breadit and Natasha’s Baking, suggest aiming for 1–2mm thickness.
Cooking at the Wrong Temperature
If your skillet isn’t hot enough, lavash stays pale and soggy. Too hot, and it scorches in seconds. You want a hot surface, but not blazing—medium-high heat is the sweet spot. Do a test with a small dough piece to check the temp before committing.
Expert Tips for Perfect Lavash
Keep It Soft with a Damp Towel
The moment a lavash comes off the pan, stack it and cover with a damp towel. This step locks in moisture and keeps the bread soft and bendable. Skip it, and you might end up with cracker-lavash (which is fine—if that’s what you’re going for).
Revive Dry Lavash Like a Pro
Stored lavash feel a little stiff? No stress. Spritz both sides lightly with water and wrap in foil. Warm it in the oven at 300°F (149°C) for about 5 minutes. It’ll come back to life like it just left the skillet.
Flavor Boost: Herbs, Seeds & More
Elevate your lavash game by mixing herbs, spices, or seeds directly into the dough. Think: toasted cumin, nigella, rosemary, or za’atar. For a final flourish, brush the surface lightly with olive oil and sprinkle with sesame or poppy seeds before baking.
Pro tip: Adding flavor directly into the dough makes every bite pop, even if you’re eating it plain!
Part 6: Frequently Asked Questions
Lavash might be simple to make, but it sure raises a lot of curiosity! Whether you’re a seasoned baker or just starting your flatbread journey, these frequently asked questions will clear up the confusion and help you bake with confidence. Let’s tackle the most common queries about this traditional Armenian flatbread.
Can I make lavash without yeast?
Yes, you absolutely can! In fact, unleavened lavash is a thing—and quite a traditional one in certain regions. Without yeast, you’ll get a flatter, crispier bread, more akin to a cracker than a wrap. It’s ideal for storing longer and is often used in rituals or as a durable snack bread.
However, if you’re chasing that soft, foldable lavash perfect for wraps, stick to a yeasted version. According to Wikipedia, both styles exist in Armenian and Middle Eastern cuisine.
What is the difference between lavash and pita bread?
Great question! Though they’re cousins in the world of Middle Eastern breads, they’re quite different:
- Lavash: Rolled paper-thin, soft or crisp depending on storage, and usually doesn’t puff into a pocket.
- Pita: Thicker and leavened to form a pocket when baked, thanks to high heat and steam.
As Charlene Truong’s breakdown in Glamour notes, lavash is the flat, flexible canvas—while pita is the fluffy pocket-holder.
How do I keep lavash soft after cooking?
Ah, the million-dollar question. It’s all about the steam. The second each lavash comes off the pan or stone, stack it and cover it with a clean, damp towel. This traps the moisture and keeps it soft and pliable.
Many home cooks on Reddit and blogs like Unicorns in the Kitchen and The Daring Gourmet swear by this trick—it’s a total game-changer.
Can I freeze lavash bread?
Definitely! Lavash freezes beautifully. Stack the cooled flatbreads with parchment paper between each one, wrap tightly in plastic wrap or foil, and store in a freezer bag.
It’ll keep for up to one month. When ready to use, just reheat wrapped in foil at 300°F for a few minutes, or microwave with a damp towel for a quick fix. Thanks to The Daring Gourmet for testing this one out!
Is lavash bread gluten-free?
Not by default. Traditional lavash is made with wheat flour, which contains gluten. But that doesn’t mean gluten-sensitive folks are out of luck. You can experiment with gluten-free flour blends, though you may need binding agents like xanthan gum to maintain flexibility.
The result won’t be exactly the same, but it’s still delicious and very doable with a few tweaks. Just be ready to trial and error your way to the perfect GF version.