
Introduction: The Ultimate Guide to Dutch oven camping recipe
Cooking outdoors is an experience that connects us to nature, history, and, of course, amazing food! Whether you’re an experienced camper or just getting started, mastering Dutch oven camping recipe cooking can turn your campsite into a gourmet kitchen. With a Dutch oven camping recipe, you can bake, roast, fry, or simmer almost anything over a campfire or with charcoal. Moreover, the versatility of this cookware allows you to experiment with different cooking techniques effortlessly. But the best part is that the flavors develop beautifully, ultimately making every meal an experience worth remembering.
In this guide, we’ll explore everything you need to know about Dutch oven camping recipe recipes. First, we’ll discuss how to choose the right Dutch oven. Then, we’ll move on to essential cooking techniques. Finally, we’ll cover the best campfire recipes—from hearty breakfasts to sweet treats—so you can make the most of your outdoor cooking experience. If you’ve ever wondered how to cook delicious and easy meals while camping, this guide has you covered.
So, grab your cast iron Dutch oven, gather around the fire, and let’s dive into the art of Dutch oven campfire cooking!
Part 1: Exploring Dutch Oven Cooking in the Great Outdoors
The Charm of Dutch Oven Cooking While Camping
Cooking with a Dutch oven is like stepping back in time. This time-tested cookware has been a favorite of outdoor enthusiasts for centuries. But why is it so loved among campers?
Simply put, it’s versatile, durable, and perfect for cooking hearty meals in the wild. Whether you’re making a bubbling stew, baking fresh bread, or frying up crispy potatoes, a Dutch oven does it all. Plus, cooking over an open fire just adds that smoky, rustic flavor that no kitchen appliance can replicate.
Historical Significance and Evolution
The Dutch oven has a rich history dating back to the 17th century when Dutch traders introduced this cast-iron cookware to the world. It became a staple for early settlers and pioneers due to its ability to retain heat and cook food evenly. Today, modern campers still rely on this classic pot for its durability and versatility.
Benefits of Using a Dutch Oven in Campsites
So, why should you choose a Dutch oven over other camping cookware? Here are some unbeatable reasons:
- Heat Retention – Keeps food warm for longer, making it perfect for slow-cooked meals.
- Even Cooking – Distributes heat evenly, preventing hot spots.
- Versatile Cooking Methods – You can bake, roast, fry, and boil all in one pot.
- Durable & Long-lasting – A good cast iron Dutch oven can last a lifetime if cared for properly.
- Perfect for Large Groups – Cook a big meal in one go, making campfire cooking easier.
Selecting the Perfect Dutch Oven for Camping
Before diving into Dutch oven recipes, let’s talk about choosing the right Dutch oven for your camping adventure.
Material Considerations: Cast Iron vs. Aluminum
There are two main types of Dutch ovens used for camping: cast iron and aluminum.
- Cast Iron Dutch Ovens
- Best for even heat distribution and slow cooking.
- Heavier but extremely durable.
- Needs seasoning and regular maintenance.
- Aluminum Dutch Ovens
- Much lighter—great for backpacking campers.
- Doesn’t rust like cast iron.
- Heats up quickly but doesn’t retain heat as well.
Verdict: If you’re car camping or setting up a base camp, go for cast iron. If weight is an issue, aluminum might be the better choice.
Ideal Size and Capacity for Camping Needs
Choosing the right size depends on how many people you’ll be cooking for. Here’s a quick guide:
| Dutch Oven Size | Servings |
|---|---|
| 8-inch (2 quarts) | 2-3 people |
| 10-inch (4 quarts) | 4-6 people |
| 12-inch (6 quarts) | 6-10 people |
| 14-inch (8 quarts) | 10+ people |
For most family camping trips, a 10- or 12-inch Dutch oven is perfect!
Why You’ll Love Cooking with a Dutch Oven
After years of using different camping cookware, nothing beats a Dutch oven for making delicious, rustic, and satisfying meals. I’ve personally used it to cook everything from campfire chili to freshly baked bread, and every time, the results are mouthwatering.
One of my best experiences was cooking a hearty stew on a chilly evening after a long hike. Not only did the Dutch oven keep the flavors rich, but it also kept the food warm for hours. As a result, the entire meal felt incredibly satisfying—truly an unbeatable experience in the great outdoors!
Part 2: Essential Techniques and Tips for Dutch Oven Cooking
Mastering Dutch Oven Cooking Techniques
Cooking in a Dutch oven is more than just throwing ingredients into a pot and hoping for the best—it’s an art. The key to perfect Dutch oven cooking lies in mastering temperature control, seasoning, and safety measures. Whether you’re baking fluffy biscuits or slow-cooking a hearty stew, understanding these essential techniques will help you create delicious, evenly-cooked meals every time.
Temperature Control and Coal Placement
One of the biggest challenges in Dutch oven cooking is maintaining the right temperature. Since you’re cooking outdoors with campfire coals or charcoal briquettes, you don’t have a precise temperature dial. Instead, you’ll need to master coal placement and heat management.
Understanding Heat Distribution
A Dutch oven distributes heat from all sides—top, bottom, and even the walls. Unlike traditional cookware that relies mostly on direct heat from below, a Dutch oven relies on even heat distribution to cook food thoroughly.
- Bottom heat is great for boiling, frying, and simmering.
- Top heat is perfect for baking and browning.
- Balanced heat (top and bottom) is ideal for roasting and slow-cooked dishes.
Methods for Achieving Desired Temperatures
To estimate the temperature in a Dutch oven, use the “Rule of Three”:
- Take the oven’s diameter in inches and add 3 briquettes for baking.
- Subtract 3 briquettes for simmering or slow cooking.
- For example, a 12-inch Dutch oven needs:
- 15 briquettes on top, 9 on bottom (350°F for baking).
- 12 on top, 6 on bottom (low simmering, ~275°F).
🔥 Pro Tip: Wind and outside temperature can impact heat levels—so always keep extra coals nearby!
Seasoning and Maintaining Your Dutch oven camping recipe
A well-seasoned Dutch oven is the key to non-stick, flavorful cooking. Without proper seasoning, food will stick, rust may form, and flavors can get lost.
Initial Seasoning Steps
Before using your Dutch oven, it’s essential to season it properly. Here’s how:
- Wash it – Remove any factory residue with warm water (no soap).
- Dry thoroughly – Moisture leads to rust, so ensure it’s completely dry.
- Apply oil – Use vegetable oil, flaxseed oil, or shortening—coat the entire oven, inside and out.
- Heat it up – Place it upside down in an oven at 400°F (200°C) for about an hour.
- Repeat – The more you season, the better it gets!
🔥 Pro Tip: Never use soap for cleaning a seasoned Dutch oven—it strips the oil coating!
Cleaning and Storage Tips
After an amazing campfire meal, cleaning your Dutch oven the right way ensures longevity.
- For light cleaning: Wipe it out with a damp cloth.
- For stuck-on food: Use hot water and a plastic scraper—never steel wool!
- For deep cleaning: Boil water inside to loosen residue.
- For storage:
- Apply a light coat of oil to prevent rust.
- Store it with the lid slightly open to allow airflow.
🔥 Pro Tip: Place a paper towel inside before storing to absorb any excess moisture.
Safety Measures for Campfire Cooking
While Dutch oven cooking is fun and rewarding, campfire safety is a must. With an open flame, hot cast iron, and burning coals, you need to be cautious to avoid burns, fires, or accidents.
Safe Handling of Hot Equipment
A Dutch oven gets extremely hot, and improper handling can lead to serious burns. Always use:
- Heat-resistant gloves – Protect your hands when lifting lids.
- Long-handled tongs – To move coals without getting too close.
- A lid lifter – A specialized tool for safely lifting the heavy lid.
🔥 Pro Tip: Never place a hot Dutch oven directly on cold surfaces—sudden temperature changes can cause cracking!
Fire Safety Protocols
Campfires are unpredictable, and a simple mistake can cause wildfires or injuries. Follow these fire safety rules:
- Always cook on a fire-safe surface (rock, sand, or a fire pit).
- Keep water or a fire extinguisher nearby in case of emergency.
- Never leave a hot Dutch oven unattended—coals can shift and cause flare-ups.
- Properly dispose of coals—bury them in dirt, not grass, to prevent fires.
🔥 Pro Tip: Check local fire restrictions before cooking—some areas have strict fire bans during dry seasons.
Part 3: Breakfast Delights in a Dutch oven camping recipe
Satisfying Breakfast Recipes for Campers
There’s nothing quite like waking up to the smell of a hearty breakfast cooking over a campfire. Whether you’re gearing up for a long day of hiking or simply enjoying a slow morning by the fire, a Dutch oven can turn basic ingredients into a satisfying, energy-packed meal.
In this section, we’ll explore two classic Dutch oven breakfast recipes that are perfect for camping: the Mountain Man Breakfast Casserole and Dutch Oven Cinnamon Rolls. These meals are not only delicious and filling but also easy to prepare with simple ingredients. Let’s fire up the coals and start the morning right!
Mountain Man Breakfast Casserole
This legendary Dutch oven breakfast casserole is a camper’s favorite—it’s loaded with eggs, potatoes, cheese, and savory goodness to keep you full for hours. It’s also super easy to make, with minimal prep time.
Whether you’re feeding a family or a large group of hungry campers, this one-pot meal will become your go-to breakfast at the campsite.
Ingredients and Preparation Steps
Before you start, gather your ingredients. This recipe feeds 6–8 people, but you can adjust quantities as needed.
Ingredients:
- 1 lb of ground sausage (or turkey sausage)
- 1 medium onion, diced
- 1 red bell pepper, diced
- 1 green bell pepper, diced
- 6 large eggs
- ½ cup milk
- 1 tsp salt
- 1 tsp black pepper
- ½ tsp garlic powder
- 3 cups frozen hash browns (or diced potatoes)
- 1 ½ cups cheddar cheese, shredded
- 1 tbsp olive oil or butter
- 1 tsp smoked paprika (optional)
- 12-inch Dutch oven with lid
- 20–24 charcoal briquettes
Preparation Steps:
- Heat your Dutch oven camping recipe over a medium fire with about 8 coals underneath.
- Add olive oil or butter to coat the bottom.
- Cook the sausage until browned, breaking it up as it cooks.
- Add onions and bell peppers; sauté until softened (about 5 minutes).
- Stir in hash browns and let them crisp for a few minutes.
- In a separate bowl, whisk together eggs, milk, salt, pepper, and garlic powder.
- Pour the egg mixture over the sausage and potatoes in the Dutch oven.
- Sprinkle cheese evenly over the top.
Cooking Instructions and Tips
Now it’s time to bake this breakfast masterpiece.
Baking the Casserole:
- Cover the Dutch oven with its lid.
- Arrange 10–12 hot coals underneath and 12–14 coals on top for even baking.
- Cook for 20–25 minutes, rotating the lid and base every 10 minutes for even heat.
- Check the eggs—when firm and fully set, remove from heat.
- Let it rest for 5 minutes, then serve!
🔥 Pro Tips:
- Add chopped mushrooms or spinach for extra nutrients.
- Swap sausage for bacon or ham, or go meatless with extra veggies.
- Sprinkle extra cheese on top during the last 5 minutes for extra meltiness.
This Mountain Man Breakfast Casserole is not just filling but also campfire-approved, making it a must-have for any camping trip!
Dutch oven camping recipe Cinnamon Rolls
Want to treat yourself to something sweet in the morning? Dutch oven cinnamon rolls are soft, gooey, and absolutely irresistible. The best part? You don’t need a bakery—you can make them from scratch or use store-bought dough right at your campsite.
Dough Preparation and Rising Techniques
For the best cinnamon rolls, fresh dough is key. While store-bought biscuit dough works in a pinch, making your own yeast dough makes all the difference.
Simple Dough Recipe:
- 3 cups all-purpose flour
- 1 packet instant yeast (or 2 ¼ tsp)
- ¼ cup sugar
- 1 tsp salt
- ¾ cup warm milk (110°F)
- ¼ cup butter, melted
- 1 egg
How to Prepare the Dough:
- In a bowl, mix yeast, warm milk, and sugar—let it sit for 5 minutes until foamy.
- Add butter, egg, and salt.
- Gradually mix in flour, kneading until a soft dough forms.
- Cover and let it rise for 1 hour or until doubled in size.
Shortcut: If making dough from scratch seems like too much work for camping, use pre-made biscuit dough instead!
Baking Process and Glazing
Once the dough is ready, it’s time to shape, bake, and glaze the rolls.
Cinnamon Filling:
- ½ cup brown sugar
- 1 tbsp cinnamon
- 3 tbsp butter, melted
Glaze:
- 1 cup powdered sugar
- 2 tbsp milk or cream
- ½ tsp vanilla extract
How to Make Cinnamon Rolls:
- Roll out the dough into a rectangle (~12×8 inches).
- Spread melted butter, then sprinkle brown sugar and cinnamon.
- Roll tightly into a log, then slice into 1-inch pieces.
- Grease the bottom of your Dutch oven and place rolls inside.
- Let them rise for 30 minutes if using homemade dough.
Baking the Rolls:
- Cover the Dutch oven and place 10 coals on bottom, 15 on top.
- Bake for 20–25 minutes, rotating every 10 minutes.
- Once golden brown, remove from heat.
🔥 Pro Tips:
- Place parchment paper inside for easy cleanup.
- Don’t overbake—the key to soft rolls is removing them once golden.
Glazing and Serving:
- Whisk together powdered sugar, milk, and vanilla.
- Drizzle glaze over warm cinnamon rolls.
- Serve immediately and enjoy the gooey goodness!
Part 4: Hearty Lunch and Dinner Recipes
Wholesome Meals for Midday and Evening
After an adventurous day in the great outdoors, nothing beats a warm, comforting meal cooked right in your Dutch oven. Whether you’re preparing a slow-cooked stew or a hearty chili, these one-pot wonders bring the taste of home to the campsite.
In this section, we’ll cover two classic Dutch oven meals that are easy to prepare, packed with flavor, and perfect for fueling your next adventure:
- Classic Beef Stew – A slow-simmered dish loaded with tender beef, potatoes, and vegetables in a rich broth.
- Campfire Chili with Cornbread Topping – A bold, smoky chili crowned with a golden, fluffy cornbread layer baked right on top.
Both of these wholesome recipes are ideal for feeding a hungry group, and they require minimal effort thanks to the Dutch oven’s magic. So, let’s build the fire, set up the coals, and get cooking!
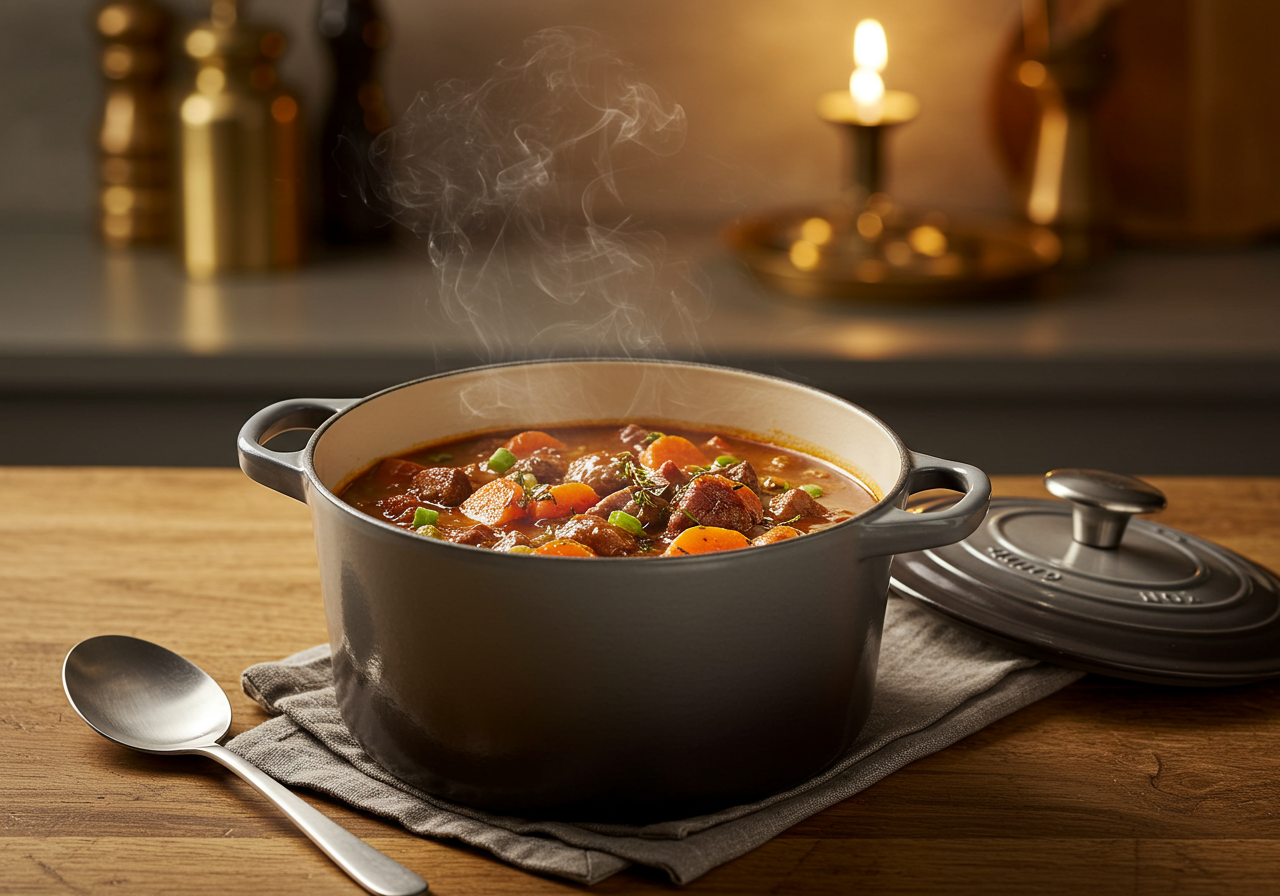
Classic Beef Stew
A Dutch oven beef stew is the ultimate comfort food for campers. Tender chunks of beef, slow-cooked in a savory, aromatic broth with potatoes, carrots, and onions, create a meal that is both nourishing and satisfying.
This recipe is all about slow cooking, allowing the flavors to meld beautifully while the beef becomes fall-apart tender.
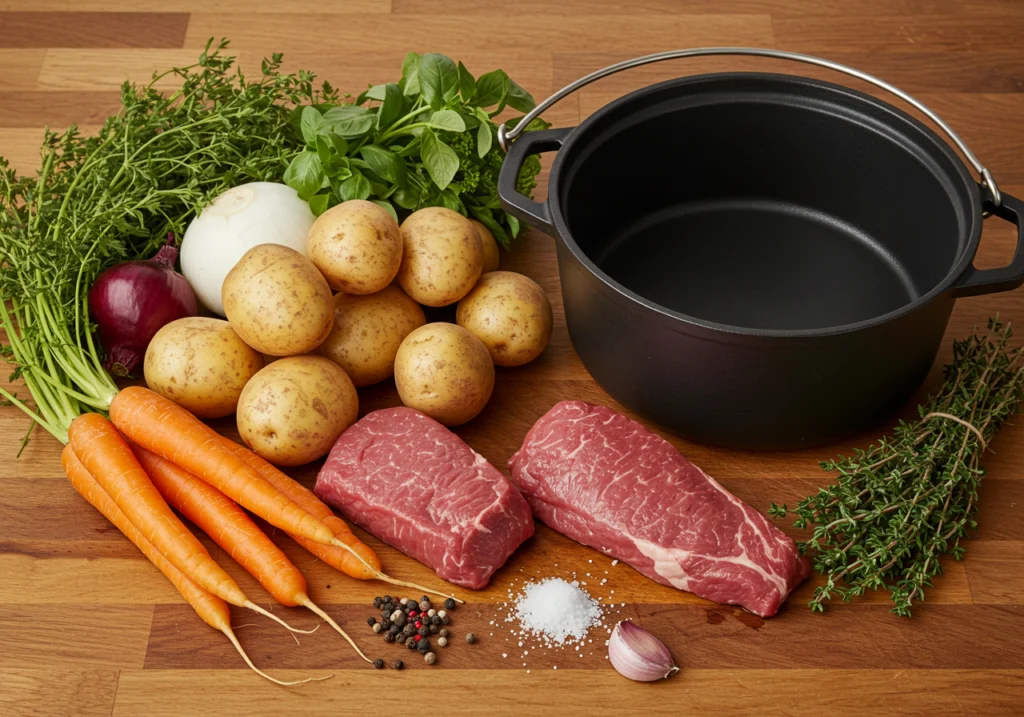
Ingredient List and Preparation
Before we dive into the cooking process, let’s gather everything we need:
Ingredients (Serves 6–8 campers):
- 2 lbs stew beef (chuck roast, cut into 1-inch cubes)
- 2 tbsp vegetable oil or butter
- 1 large onion, diced
- 3 large carrots, sliced
- 3 medium potatoes, cubed
- 3 cloves garlic, minced
- 1 tbsp tomato paste
- 4 cups beef broth
- 1 cup red wine or extra broth
- 1 tbsp Worcestershire sauce
- 1 tsp thyme (dried or fresh)
- 1 tsp rosemary
- 1 bay leaf
- 1 tsp salt
- ½ tsp black pepper
- 1 tbsp flour (to thicken)
- 12-inch Dutch oven with lid
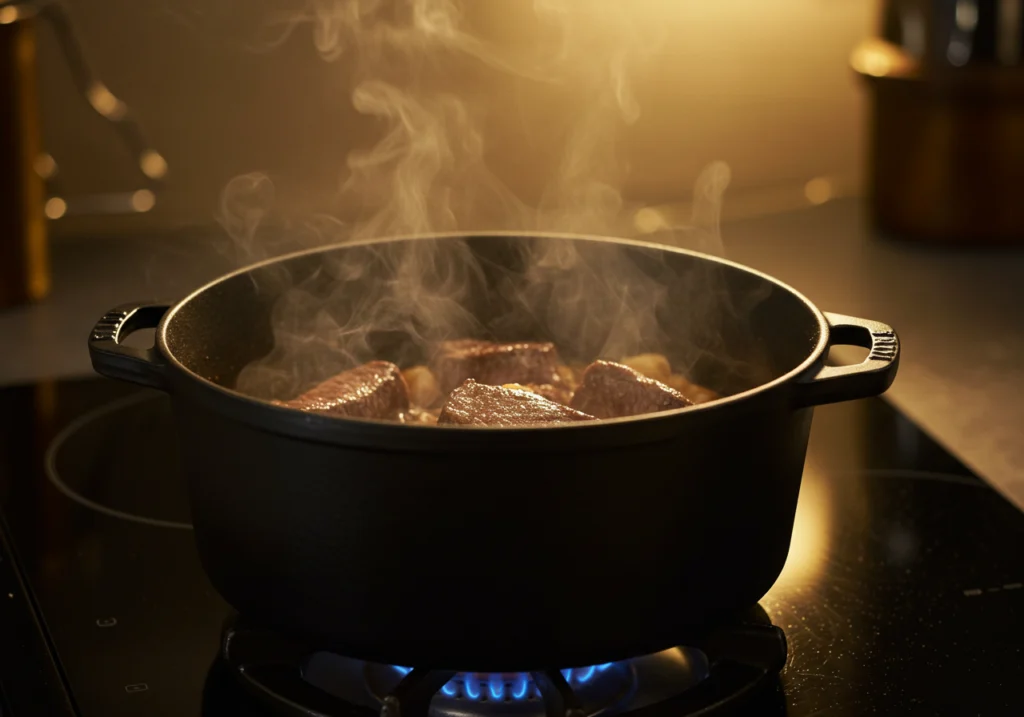
Preparation Steps:
- Preheat the Dutch oven over medium heat using about 10 coals underneath.
- Brown the beef: Add oil or butter, then sear beef cubes in batches until golden brown. Remove and set aside.
- Sauté aromatics: Cook onions, garlic, and tomato paste until fragrant.
- Deglaze the pot: Pour in wine or broth, scraping up browned bits from the bottom.
- Add remaining ingredients: Return beef to the pot, followed by carrots, potatoes, broth, Worcestershire sauce, and seasonings.
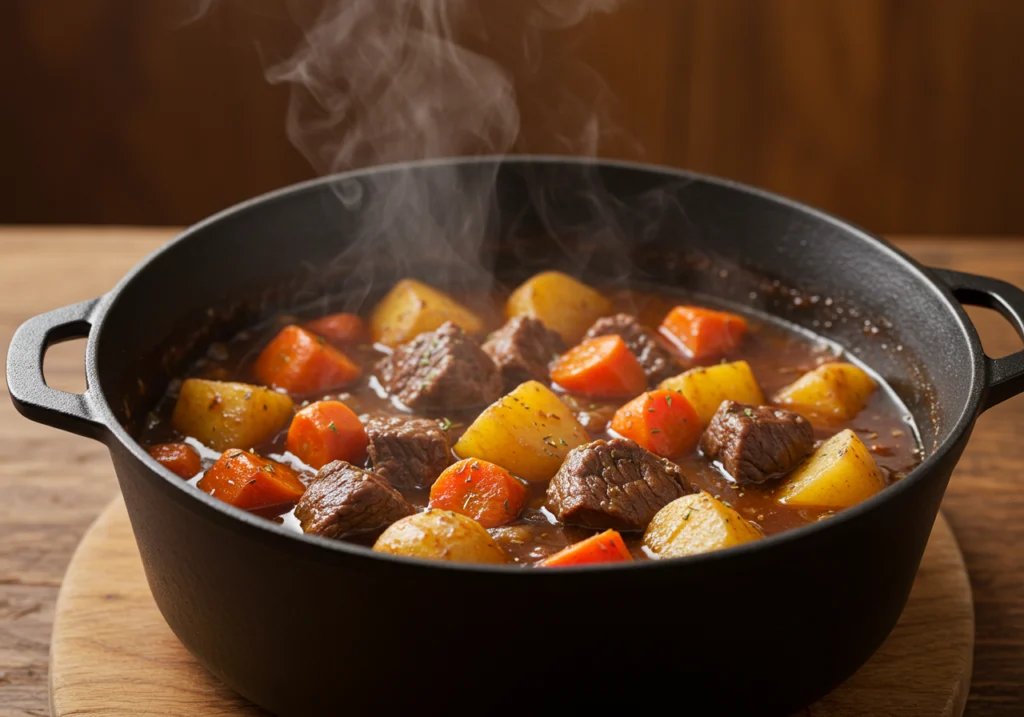
Slow-Cooking Techniques for Tender Meat
Low and slow is the name of the game!
Simmering Over Campfire Coals:
- Cover the Dutch oven camping recipe and place 8 coals underneath and 10–12 on top for slow cooking.
- Simmer for 2–3 hours, stirring occasionally.
- If the broth reduces too much, add extra water or broth as needed.
🔥 Pro Tip: The longer it simmers, the better the flavor. The beef will become incredibly tender after 2.5 hours.
Thickening the Stew:
- In the last 30 minutes, mix 1 tbsp flour with ¼ cup broth to create a slurry.
- Stir it into the stew and let it thicken.
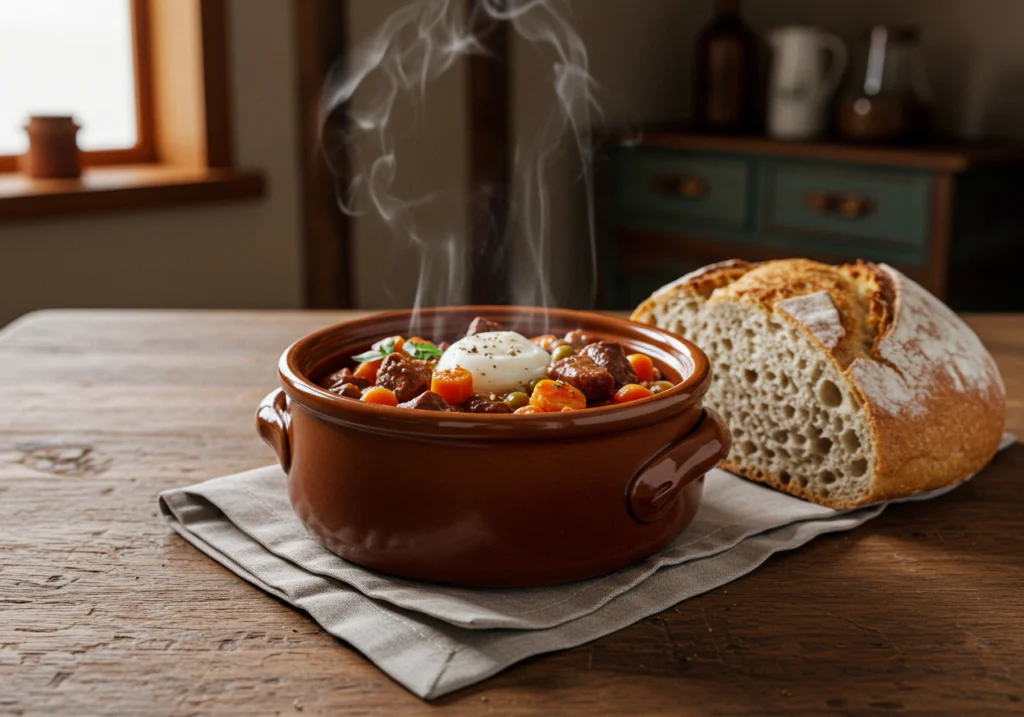
Once done, serve piping hot with crusty bread or biscuits. This dish is hearty, flavorful, and guaranteed to warm you up on a chilly evening!
Campfire Chili with Cornbread Topping
A big pot of smoky, spicy chili topped with fluffy cornbread is the definition of comfort food in the wild. The combination of rich, meaty chili and golden, slightly sweet cornbread creates the perfect one-pot meal.
Crafting a Flavorful Chili Base
The key to great chili is building layers of flavor with spices, tomatoes, and slow-simmered beans.
Ingredients:
- 1 lb ground beef (or turkey)
- 1 onion, diced
- 1 bell pepper, chopped
- 2 cloves garlic, minced
- 1 can (15 oz) diced tomatoes
- 1 can (15 oz) tomato sauce
- 1 can (15 oz) kidney beans, drained
- 1 can (15 oz) black beans, drained
- 1 cup beef broth
- 2 tbsp chili powder
- 1 tsp cumin
- 1 tsp smoked paprika
- ½ tsp salt
- ½ tsp black pepper
- ½ tsp cayenne pepper (optional)
Cooking Steps:
- Heat the Dutch oven over medium heat with about 8 coals underneath.
- Brown the beef: Cook until no longer pink, then drain excess fat.
- Sauté onions, garlic, and bell pepper until softened.
- Add tomatoes, beans, broth, and spices. Stir well.
- Simmer uncovered for 30 minutes, stirring occasionally.
🔥 Pro Tip: Letting chili simmer longer enhances the depth of flavor!
Preparing and Baking the Cornbread Layer
Now for the fun part—baking the cornbread topping right over the chili!
Cornbread Ingredients:
- 1 cup cornmeal
- 1 cup flour
- 1 tbsp sugar
- 1 tsp baking powder
- ½ tsp salt
- 1 cup milk
- 1 egg
- 2 tbsp butter, melted
Steps to Make Cornbread:
- In a bowl, whisk together cornmeal, flour, sugar, baking powder, and salt.
- Add milk, egg, and melted butter, stirring until smooth.
- Carefully spoon cornbread batter over the simmering chili, spreading evenly.
- Cover the Dutch oven and place 10 coals on top, 6 underneath.
- Bake for 20–25 minutes, or until cornbread is golden brown.
🔥 Pro Tip: Stick a toothpick into the cornbread—if it comes out clean, it’s ready!
Part 5: Delectable Dutch oven camping recipe Desserts
Sweet Treats to Conclude Your Camp Meals
After a long day of outdoor adventure, there’s no better way to wrap up a hearty campfire meal than with a warm, homemade dessert straight from your Dutch oven. Desserts made in a Dutch oven have a rustic charm and deliver rich, comforting flavors that are simply irresistible.
In this section, we’ll cover two classic Dutch oven desserts that are easy to make, incredibly satisfying, and guaranteed to impress your fellow campers:
- Peach Cobbler – A golden, buttery crust baked over warm, spiced peaches.
- Chocolate Lava Cake – A rich, fudgy cake with a molten chocolate center.
Both recipes require minimal effort and simple ingredients, making them perfect for campfire cooking. Let’s dive into these campfire-friendly sweet treats!
Peach Cobbler
A Dutch oven peach cobbler is the ultimate old-fashioned campfire dessert. With juicy, caramelized peaches and a golden, biscuit-like topping, it’s a sweet, comforting delight that’s surprisingly easy to make.
Selecting and Preparing Fresh Peaches
For the best flavor, always use fresh, ripe peaches when they’re in season. However, canned or frozen peaches work just as well when camping.
Ingredients (Serves 6–8 campers):
- 6 fresh peaches, sliced (or 2 cans of sliced peaches, drained)
- ½ cup brown sugar
- 1 tsp cinnamon
- ½ tsp nutmeg
- 1 tsp vanilla extract
- 2 tbsp butter, melted
Preparation Steps:
- In a bowl, toss peach slices with brown sugar, cinnamon, nutmeg, vanilla, and melted butter.
- Let the peaches sit for 10 minutes to release their natural juices.
- Pour the peach mixture into the Dutch oven, spreading evenly.
Baking the Cobbler to Perfection
The key to a perfect cobbler is getting the biscuit topping just right.
Cobbler Topping:
- 1 cup flour
- ½ cup sugar
- 1 tsp baking powder
- ¼ tsp salt
- ½ cup milk
- 2 tbsp butter, melted
Steps to Bake:
- In a separate bowl, mix flour, sugar, baking powder, and salt.
- Stir in milk and melted butter until combined.
- Drop spoonfuls of batter over the peach mixture, spreading gently.
- Cover the Dutch oven and place 8 coals underneath and 14 on top.
- Bake for 30–40 minutes, rotating the lid every 10 minutes.
- The cobbler is ready when golden brown on top and bubbling underneath.
🔥 Pro Tip: Serve with whipped cream or vanilla ice cream for an extra treat!
Chocolate Lava Cake
For the chocolate lovers, nothing beats a Dutch oven lava cake—a rich, moist chocolate cake with a gooey molten center that oozes out when you cut into it.
Mixing the Batter and Adding the Chocolate Center
A good lava cake starts with a simple batter and a chocolatey surprise in the middle.
Ingredients:
- 1 cup flour
- ½ cup cocoa powder
- ¾ cup sugar
- 1 tsp baking powder
- ¼ tsp salt
- ¾ cup milk
- 1 tsp vanilla extract
- ¼ cup butter, melted
- 1 cup chocolate chips or chocolate chunks
Preparation Steps:
- In a bowl, whisk together flour, cocoa powder, sugar, baking powder, and salt.
- Stir in milk, vanilla, and melted butter until smooth.
- Pour the batter into the Dutch oven.
- Sprinkle chocolate chips or place chocolate chunks in the center for a molten core.
Achieving the Ideal Gooey Consistency
The trick to a perfect lava cake is baking just long enough to set the edges while keeping the center gooey and molten.
Baking Steps:
- Cover the Dutch oven and place 6–8 coals underneath and 12–14 on top.
- Bake for 15–20 minutes, rotating the lid every 5–7 minutes.
- Check for doneness—the edges should be firm, but the center should jiggle slightly.
- Remove from heat and let sit for 5 minutes before serving.
🔥 Pro Tip: Serve warm with powdered sugar, fresh berries, or a scoop of ice cream.
Part 6: Frequently Asked Questions
Addressing Common Queries About Dutch oven camping recipe
Camping with a Dutch oven opens up a world of delicious possibilities, but if you’re new to using one, you probably have a few questions. From choosing the right Dutch oven to understanding temperature control, we’ve gathered some of the most common queries to help you cook confidently over a campfire.
Is a Dutch oven camping recipe good for camping?
Absolutely! A Dutch oven is one of the best cooking tools for camping because of its versatility and durability. It allows you to:
- Bake, fry, simmer, roast, and braise all in one pot.
- Hold and distribute heat evenly, making cooking over coals easy.
- Cook large portions, which is great for group camping.
- Last a lifetime with proper care, especially if it’s made of cast iron.
The heavy lid traps moisture, ensuring that everything from slow-cooked stews to freshly baked bread turns out perfectly.
🔥 Pro Tip: If weight is a concern, consider an aluminum Dutch oven, which is lighter but still effective for camp cooking.
What is the rule of 3 Dutch oven camping recipe?
The “Rule of 3” is a simple method for estimating Dutch oven temperature when cooking with charcoal briquettes.
- Take the oven’s diameter (in inches).
- Add 3 to that number for the number of coals on the lid.
- Subtract 3 for the number of coals underneath.
For example, for a 12-inch Dutch oven:
- 15 coals on top
- 9 coals underneath
- Equals about 350°F (176°C) for even cooking.
🔥 Pro Tip: This is just a guide—adjust coal placement based on wind conditions and outdoor temperature.
What is the difference between a Dutch oven and a camping Dutch oven?
While both regular Dutch ovens and camping Dutch ovens serve the same purpose, there are a few key differences:
| Feature | Regular Dutch Oven | Camping Dutch Oven |
|---|---|---|
| Material | Enameled or bare cast iron | Usually cast iron or aluminum |
| Legs | Flat bottom | Has three short legs to stand over coals |
| Lid Design | Domed or smooth lid | Flat lid with a rim to hold coals |
| Cooking Surface | Used on stovetops/ovens | Designed for open-fire or charcoal cooking |
A camping Dutch oven is specifically designed for outdoor use, allowing for better heat control with coals.
🔥 Pro Tip: If you only have a regular Dutch oven, you can still use it on a camping stove or with a tripod over a fire.
Can you put an enameled Dutch oven camping recipe on a campfire?
Technically, you can, but it’s not recommended. Enameled Dutch ovens are not designed for direct flames, and extreme heat can cause:
- Cracking or chipping of the enamel.
- Discoloration from soot and fire.
- Uneven heating, since the enamel prevents full heat absorption.
If you must use an enameled Dutch oven camping recipe outdoors:
- Place it on a grill grate above the flames rather than directly on hot coals.
- Use it on a propane camp stove instead of an open fire.
🔥 Pro Tip: If you love campfire cooking, invest in a bare cast iron Dutch oven—it will last a lifetime and handle the heat without damage.