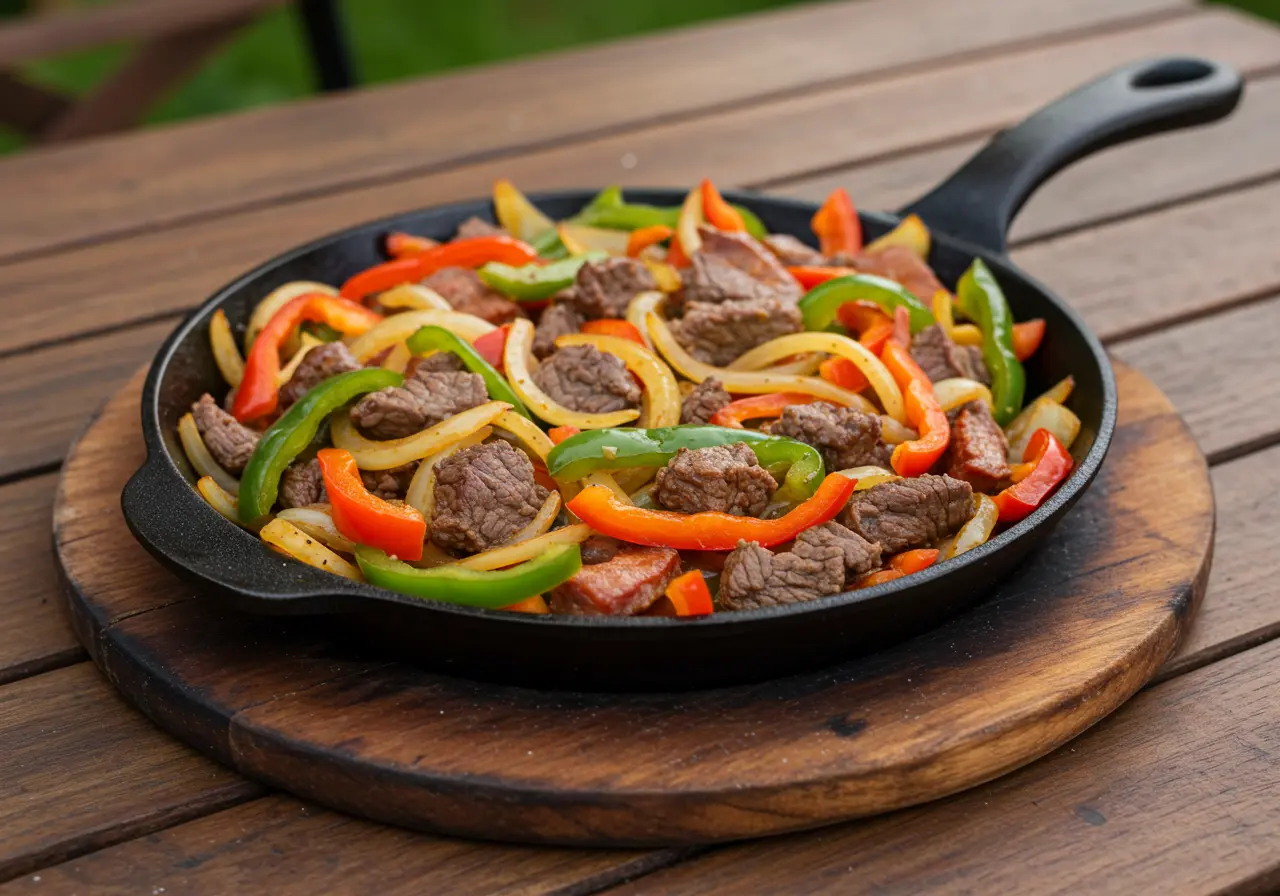
Imagine a sizzling skillet kissed by flame, sending savory aromas into the air, echoing the rustic charm of Northern Mexico. That’s the beauty of a dish called discada. More than just a cowboy stir-fry, discada is a celebration of bold flavors, simple ingredients, and shared moments around open fires. In this guide, I’ll walk you through the origins, essence, and my own delicious experience cooking an authentic discada recipe. Buckle up—it’s about to get flavorful.
Part 1: What is Discada?
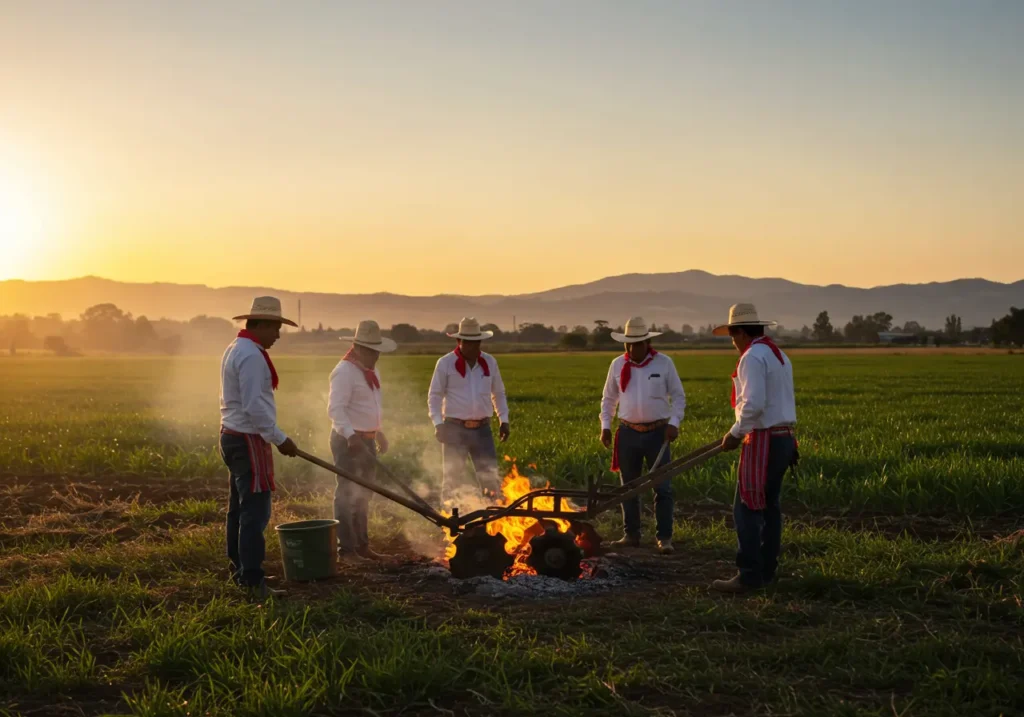
When you first hear the word discada, it might sound mysterious—perhaps even exotic. But oh boy, let me tell you, it’s comfort food with a cowboy kick. Discada is a legendary Northern Mexican skillet dish, traditionally made by ranchers using a repurposed plow disc as a grill. That’s right—the same steel disc meant to till the soil became the perfect vessel to stir-fry meat, veggies, and spices under the open sky.
In a sense, discada is Mexico’s answer to the wok. It’s about efficiency, flavor layering, and rustic tradition. You won’t need fancy gadgets or Michelin-star skills—just honest ingredients, a hot surface, and a big appetite.
A Flavor-Packed Northern Legacy
Discada originates from the rural regions of Chihuahua and Coahuila, where ranchers made do with what they had. They’d grab their leftover meats, toss them in a sizzling disc over an open fire, and voilà—a dish that could feed a crowd and warm a soul. Over time, this farmer’s feast evolved into an iconic street food across northern Mexico and parts of the southern U.S.
Think Tex-Mex, But Earthier
Although some folks compare it to fajitas or stir-fry, discada’s taste is unique—earthy, smoky, and slightly spicy with a hint of citrus and char. Plus, the traditional cooking method enhances everything. Each ingredient is added gradually, letting flavors meld together like a perfectly orchestrated food symphony.
Why the Plow Disc?
Here’s the magic: that giant concave steel disc, originally used for plowing soil, was flipped and welded with handles and a stand. Now, it’s not just a tool—it’s a stage for flavors to dance. You can cook a discada recipe for ten or more people, making it ideal for family reunions, tailgates, or lazy Sundays.
Part 2: Understanding the Discada Cooking Method
Cooking discada isn’t just about mixing ingredients in a hot pan—it’s a method steeped in ingenuity, community, and outdoor tradition. While the discada recipe may have evolved over time, the soul of the dish remains rooted in its unique cooking method. Let’s break down what makes the traditional discada setup so iconic—and how you can recreate the experience at home with modern tools.
The Traditional Discada Cooking Apparatus
At the heart of an authentic discada lies an unexpected hero—the plow disc. Yep, we’re talking about actual farm equipment, the same kind used to till land. Ranchers in Northern Mexico ingeniously repurposed these heavy-duty discs into outdoor cooking pans, creating a method that was equal parts practical and genius.
These discos, as they’re affectionately called, are essentially concave steel pans that were welded together, sometimes with added legs and handles. Their shape makes them perfect for stir-frying meats and veggies, as the oil naturally pools in the center. This allows for precise heat control: high heat in the middle for searing and gentler heat on the sides for simmering or resting ingredients.
What makes the disc even more special is its ability to cook large quantities—perfect for gatherings. The large surface area allows you to layer in ingredients gradually, coaxing out those rich, caramelized flavors. It’s part grill, part wok, part griddle—and all flavor.
I still remember the first time I saw one in action. There was smoke in the air, laughter around the fire, and the unmistakable sound of sizzling meat echoing into the twilight. You can almost taste the story in every bite.
If you want to explore this apparatus further, Kent Rollins shares an excellent look at traditional discada cooking on his blog, including how to season your disc and manage firewood heat zones. You can check out his rustic and informative guide here: KentRollins.com/discada.
So, while it may have started as a clever workaround, the traditional disc has become a symbol of flavor, resourcefulness, and Mexican culinary heritage.
Modern Alternatives to the Traditional Disc
But hey, let’s be honest—not all of us have a steel plow disc lying around. And that’s totally fine. If you’re eager to whip up a discada recipe without the traditional gear, there are some fantastic modern tools that’ll get the job done just as well.
Woks are a top alternative. Their shape is remarkably similar to a disc, with a concave center and sloped sides. Cast iron woks, in particular, hold and distribute heat evenly, allowing for that essential sear while offering enough room to stir and toss.
Another great option is a large cast-iron skillet. While it’s not quite as expansive, it does the trick beautifully, especially if you’re cooking for a smaller group. Just make sure it’s wide and deep enough to hold all your meat and veggies comfortably.
For those cooking outdoors, propane-powered discada grills—yes, they make those now!—offer an authentic feel with modern convenience. And if you’re really feeling adventurous, flat-top griddles can also be used to mimic the wide cooking space.
What matters most is the technique: cooking in layers, controlling the heat, and letting each ingredient shine before adding the next. Whether you’re using a traditional disco or a trusty wok, the end goal is the same—bold, smoky flavor that sticks with you.
Part 3: Ingredients for an Authentic Discada Recipe
They say good food starts with great ingredients—and when it comes to discada, that couldn’t be more true. This beloved dish isn’t just about tossing whatever’s in your fridge into a pan; it’s a carefully layered medley of meats, veggies, and spices that come together to create an explosion of rustic flavor. Let’s break down exactly what you’ll need to nail an authentic discada recipe, whether you’re grilling on a disc or sizzling it up in a cast-iron skillet.
Essential Meats Used in Discada
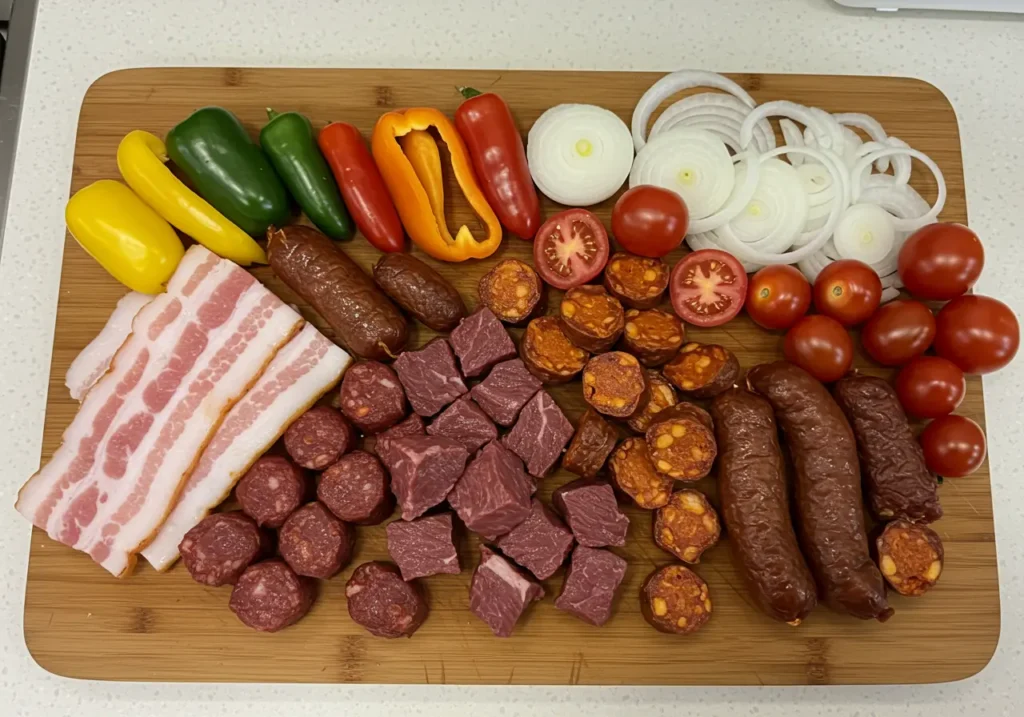
At the core of any mouthwatering discada is a generous helping of mixed meats. Traditionally, discada was a celebration of abundance—ranchers would use a variety of meats to feed the crew. And trust me, this meat combo is the soul of the dish.
Here’s what to add to your skillet:
- Beef (Sirloin or Skirt Steak): Tender, juicy, and meaty, this is your base. Look for cuts with light marbling for extra flavor without excessive fat.
- Chorizo (Mexican-style): This adds a spicy, savory kick and bold red color thanks to paprika and chili. Be sure to remove the casing and break it up while cooking.
- Sausage (Beef or Chicken Links): Some folks throw in sliced sausage for extra texture and seasoned flavor. Just don’t overdo it—balance is key.
- Ham (Optional but flavorful): Adds a touch of smoky saltiness. I used thinly sliced pieces and loved how they crisped up at the edges.
💡 Pro Tip: Always begin by cooking the fattier meats first—like chorizo or sausage. As they render, they create a rich base of oil and seasoning to flavor the rest.
Vegetables and Aromatics
Now that we’ve got the meat medley sizzling, it’s time to toss in the flavor-builders: a rainbow of vegetables that aren’t just there for color—they balance the richness and round out the dish.
Here’s the veggie dream team for your discada recipe:
- White or Yellow Onions: Start with these. Slice them thin and let them caramelize for that sweet-savory base.
- Bell Peppers (Red, Green, Yellow): These add vibrant color and mild sweetness. I prefer red for its richness and slight fruity note.
- Tomatoes (Roma or Vine-Ripe): Chop them fresh—they melt down into a savory sauce that soaks into every bite.
- Jalapeños or Serranos: Want a kick? These chilies bring a touch of heat without overwhelming the dish.
You don’t want these to be mushy—so timing is everything. Toss them in after the meats have mostly cooked, letting them soften slightly while still holding their shape and bite.
On my first try, I overloaded the peppers and ended up with a soupy mix. Lesson learned: a light hand makes for a better blend.
Seasonings and Marinades
Alright, time to jazz things up. While the meats and vegetables pack plenty of natural flavor, seasoning is the magic touch that elevates a good discada into a phenomenal one.
Here’s what you should consider adding to your flavor arsenal:
- Garlic (Fresh, Minced): Adds aromatic depth and that irresistible savory note.
- Ground Cumin: Earthy and slightly nutty—it brings warmth to the dish.
- Black Pepper & Salt: Always taste and adjust throughout the process.
- Paprika (Smoked or Regular): Gives it a subtle heat and smokiness.
- Oregano (Mexican if you have it): Offers a citrusy, minty finish.
As for marinades, you can prep your beef with a squeeze of lime juice, a splash of soy sauce, and some garlic powder for 20–30 minutes before it hits the pan. This not only tenderizes the meat but infuses it with zesty undertones that balance the richness.
Honestly, I didn’t marinate the first time—and though the result was tasty, it lacked that pop. The next time, I marinated the meat and wow… total flavor upgrade.
Some cooks even add a splash of orange juice or Coca-Cola for a caramelizing effect. It’s not traditional across the board, but in some parts of Mexico, that’s the secret twist.
The goal isn’t to overpower but to enhance—to bring out the best in each ingredient while giving the dish a signature flavor that says this is home.
Part 4: Step-by-Step Guide to Preparing Discada
Now that we’ve gathered the star-studded cast of meats and veggies, it’s time to roll up our sleeves and cook. The secret to a mouthwatering discada recipe isn’t just about what you use—it’s how you cook it. Timing, order, and patience make all the difference between a bland mishmash and a smoky, flavorful masterpiece.
Preparing the Meats
Before your pan even touches the fire, proper prep is everything. Trust me, I learned the hard way. The first time I made discada, I rushed through the prep and ended up with unevenly cooked meat. Lesson learned—prep like a pro, cook like a boss.
Here’s how to get your meats ready for action:
- Trim excess fat from your beef or sausage—but don’t go too crazy. A little fat = flavor.
- Slice your meats thin and uniform. About ¼ inch thick is the sweet spot. This ensures even cooking and helps build those irresistible crispy bits.
- For chorizo, remove the casing and crumble it before cooking. It should resemble ground meat.
- Cut ham or other cured meats into thin strips or small squares, ideal for crisping up.
💡 Marination Magic:
If you want your discada to really shine, take an extra 30 minutes to marinate the beef. Here’s a quick mix you can whip up:
- 1 tbsp soy sauce
- 1 tbsp lime juice
- ½ tsp ground cumin
- 1 tsp garlic powder
- A pinch of salt and pepper
Massage this into your beef, cover it up, and let it chill in the fridge. This adds depth, tenderness, and a lovely zingy background note. I followed a similar tip from Villa Cocina, and it made a noticeable difference in both aroma and bite.
Pro tip: Keep meats separated on trays. This makes it easier when cooking in stages and prevents overcooking.
Cooking Sequence and Techniques
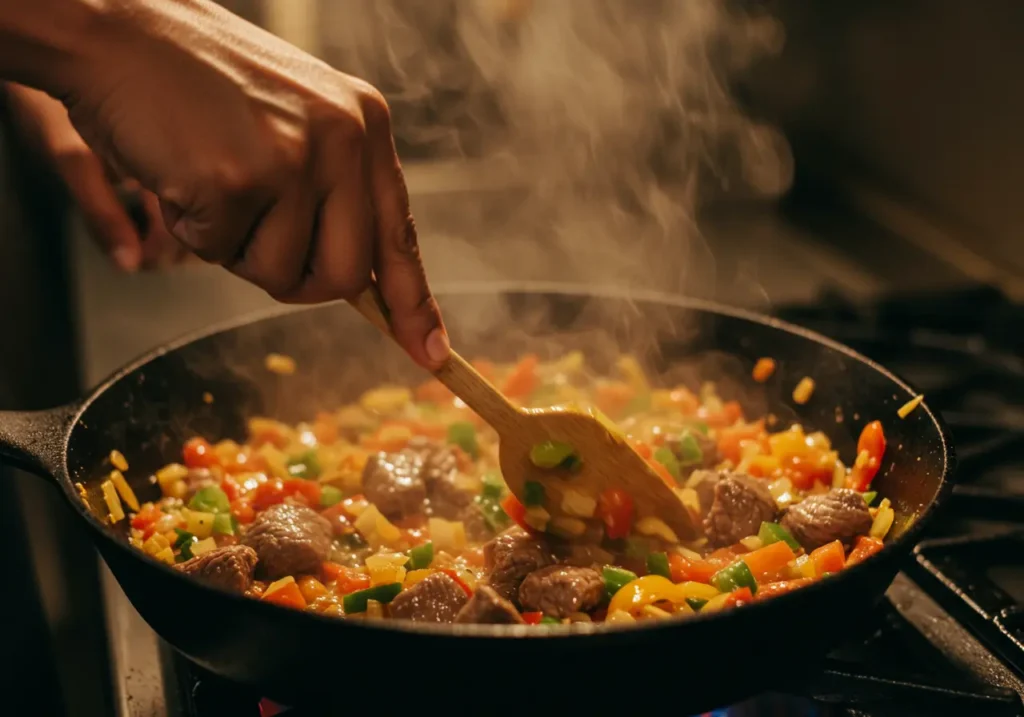
Cooking discada is like conducting a symphony of sizzle. Each ingredient has its time to shine. The secret is layering—building flavor step-by-step, with each meat lending its juices and character to the next.
Here’s the ideal cooking sequence:
- Heat the disc or skillet over medium-high heat. Add a touch of oil if needed (though the fat from meats usually suffices).
- Start with the fattiest meat (chorizo or sausage). Let it brown and render its oils. Remove it and set aside.
- Next, cook your ham or cured meat. It crisps up quickly and adds a salty note to the oil. Again, remove and set aside.
- Add your marinated beef. Sear it in the flavored oil, browning both sides. This is when the aromas start turning heads.
- Once browned, return the earlier meats to the pan. Stir to combine.
- Let them simmer together for a few minutes, stirring occasionally. This is where the magic happens—all those juices mingle and create a rich, unified base.
Keep your flame steady but not too high. You want sizzle, not scorching. Stir gently—don’t crowd the pan, or you’ll steam rather than sear.
As My Slice of Mexicopoints out, a traditional discada is as much about patience as it is about precision. The dish tells its story in layers, so don’t rush the narrative.
Watch for the fond—those crispy brown bits sticking to the pan. That’s flavor gold. Deglaze gently with a splash of lime juice or tomato juice to fold that goodness back into the dish.
And don’t forget to taste as you go. Adjust salt and seasoning early, not at the end.
Incorporating Vegetables and Finalizing the Dish
Once the meats are singing together in harmony, it’s time to welcome the vegetable chorus. This part requires a delicate hand—too early, and you’ll get mush. Too late, and they’ll be raw and overpowering.
Here’s the smart way to fold in your aromatics:
- Add onions first. Let them caramelize slightly to release their sweet notes. You’ll notice the pan’s aroma shift from savory to savory-sweet—pure magic.
- Next, toss in the bell peppers. Don’t crowd them. Give them space to blister slightly but stay crisp. This texture is key.
- Follow up with tomatoes. Stir gently and let them break down into a rustic, chunky sauce. They tie the dish together like a flavorful ribbon.
- If using chilies (like jalapeños), add them now to infuse heat without overpowering.
You’ll know it’s ready when the vegetables are tender yet still colorful, and the meats are coated in a glistening, flavorful mix.
At this point, some folks cover the pan and let everything rest off the heat for a few minutes. This helps flavors settle and gives you time to warm your tortillas.
🎯 Final Touch: Sprinkle in some chopped cilantro or a few dashes of lime juice for freshness. I even added a squeeze of orange once, and it gave the whole dish a surprisingly mellow finish.
You’ll want to serve immediately—discada waits for no one. Set everything out buffet-style and let your guests scoop onto tortillas, top with salsa, and devour with messy hands and happy grins.
Part 5: Serving and Enjoying Discada
So, the hard part’s over. The meats are sizzling in harmony, the veggies are tender and bright, and your kitchen smells like a Northern Mexican street fair. But before you dig in, let’s talk about the finishing touch—how to serve and enjoy this bold and rustic discada recipe like a true pro.
Traditional Accompaniments
The beauty of discada is that it doesn’t need much dressing up. It’s already a full-flavored, hearty meal. But with the right accompaniments, you can take the experience from great to unforgettable.
Here are the traditional pairings you won’t want to skip:
- Corn or Flour Tortillas: These are non-negotiable. Warm them up right before serving so they’re soft, steamy, and pliable. Corn gives a rustic edge, while flour wraps everything up like a soft, doughy hug.
- Salsas (Green and Red): Salsa verde adds tangy brightness, while roasted tomato salsa brings smoky depth. Offer both and let your guests choose their heat.
- Lime Wedges: A squeeze of fresh lime cuts through the richness and elevates every bite.
- Guacamole or Sliced Avocados: Creamy, cool, and perfect for layering into a tortilla.
- Grilled Scallions or Nopales: These veggies are popular on Northern Mexican platters and add a touch of charred goodness.
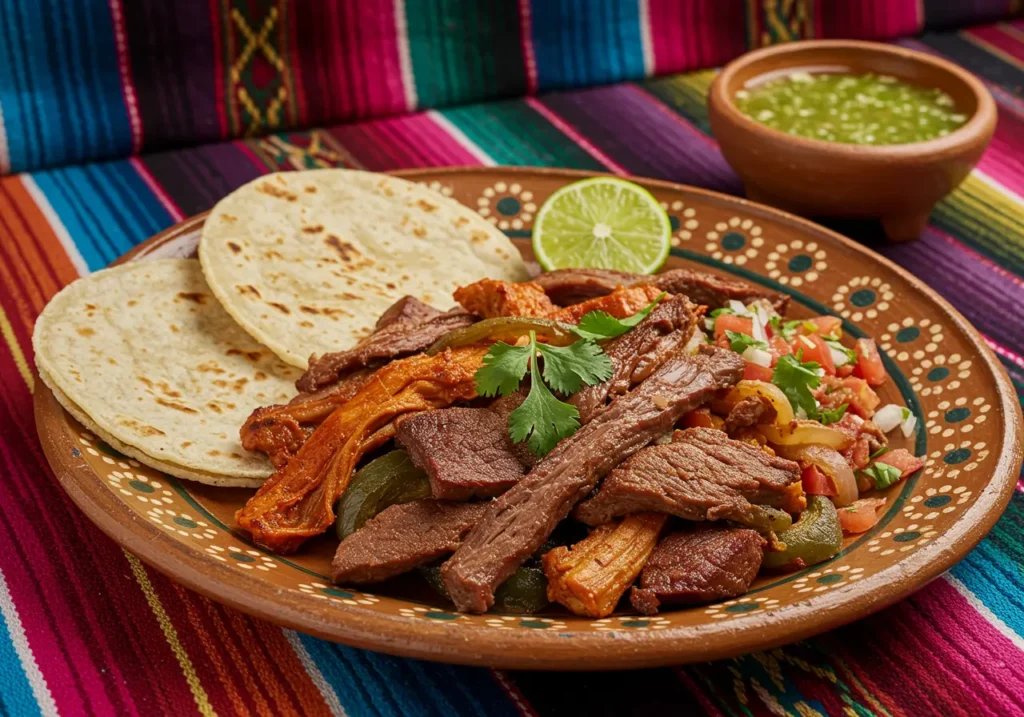
Some folks also like adding charro beans or pico de gallo as a side. Personally, I love scooping a spoonful of smoky beans into my tortilla before piling in the discada—it’s ridiculously satisfying.
For a complete cultural experience, Joy and Mealrecommends serving discada family-style, outdoors if possible, with everyone building their own tacos and savoring the flavors at their own pace.
Presentation Tips
They say we eat with our eyes first—and discada, when presented right, can be a showstopper. Whether you’re cooking for a crowd or keeping it cozy with family, how you plate it makes all the difference.
Here’s how to make your dish look as good as it tastes:
- Serve directly in the disc or skillet. Nothing beats the rustic charm of a sizzling dish at the center of the table. It keeps the food warm and the vibe authentic.
- Garnish with chopped cilantro, sliced radishes, or grilled lime halves. These touches add color, freshness, and texture.
- Set up a DIY taco station. Arrange warm tortillas in a cloth-lined basket, display your salsas in colorful bowls, and keep lime wedges within arm’s reach. Your guests will love building their own tacos, customizing flavors, and going back for seconds.
When I hosted my first discada night, I used a wooden cutting board for the toppings and a cast iron skillet right in the middle of the table. The reactions? Let’s just say folks were snapping pics before they even took a bite.
Presentation doesn’t need to be fancy—it just needs to feel inviting. Let the food be the centerpiece, and your guests will be wowed.
Part 6: Variations and Regional Twists
One of the most beautiful things about discada—besides its mouthwatering aroma—is its flexibility. Although rooted in Northern Mexico’s cowboy culture, discada recipes have evolved and adapted across regions, families, and even continents. From border towns to backyard BBQs, no two plates are quite the same. And honestly? That’s the magic of it.
Regional Variations of Discada
Across Mexico, discada is as diverse as the land itself. While the base remains the same—a skillet filled with meats, veggies, and bold spices—different states give it a twist of their own.
- Chihuahua and Coahuila: The birthplace of discada keeps things rustic and hearty. You’ll find generous helpings of beef, chorizo, and simple seasonings cooked on a traditional disco de arado. It’s less about flare and more about feeding the soul.
- Nuevo León: Up north near Monterrey, discada often gets a slightly smokier treatment. Grilled onions and fire-roasted chilies are commonly added, and the meats may be cooked over mesquite coals for that iconic char.
- Tamaulipas: Here, the dish might feature more aggressive spices—think serrano peppers and extra cumin. It’s bold, spicy, and not for the faint-hearted.
- Texas Borderlands (Tex-Mex Influence): In places like El Paso, discada tacos have become street food staples. Ground beef, sausage, and store-bought hot dogs sometimes find their way in—adding a bit of convenience and flair without losing the essence.
In fact, KUT & KUTX Studios documented how local culture and accessibility influence discada variations, especially in the border towns. From seasoning styles to ingredient swaps, every region leaves its flavorful fingerprint.
So, whether it’s smoked, spicy, citrusy, or chili-heavy—each version brings something fresh to the skillet.
Personal Adaptations and Fusion Ideas
Let’s be real—once you’ve made discada once, your inner chef starts to whisper: “What if I added this?” And that’s the beauty of the dish—it welcomes creativity.
Here are a few fusion ideas and personal touches I’ve tried (and loved):
- Korean-Mexican Twist: Add thinly sliced marinated bulgogi beef and gochujang-based sauce for a smoky-sweet punch. Top with kimchi slaw in your tortilla. It’s fusion, it’s bold, it’s phenomenal.
- Tex-Mex Taco Bowl: Serve your discada over cilantro-lime rice with shredded cheese, avocado slices, and charred corn. It turns a rustic dish into a colorful, hearty bowl.
- Breakfast Discada: Yep, I went there. Scramble in a few eggs toward the end of cooking and wrap the mix in a flour tortilla. Add some salsa and bam—breakfast burrito goals achieved.
- Vegetarian Version: Swap the meats with mushrooms, smoked tofu, and plant-based chorizo. You’ll still get a satisfying, umami-rich bite without the meat.
The goal with fusion isn’t to “fix” discada—it’s to honor its versatility and celebrate how it adapts to wherever it’s cooked. Just remember: balance flavors, keep the essence, and let the skillet tell your story.
Part 8: Frequently Asked Questions (FAQs)
Let’s face it—discada isn’t as widely known outside of Northern Mexico and the southwestern U.S., so naturally, curious cooks have questions. Whether you’re new to this smoky skillet dish or just refining your technique, these frequently asked questions will clear things up and bring you closer to becoming a discada recipe aficionado.
What kind of meat is discada?
Discada isn’t just one type of meat—it’s a medley. Traditionally, this dish blends a variety of beef cuts, sausages, and other proteins in layers to create complex, savory flavor. The most common choices include thinly sliced beef (like sirloin or skirt steak), seasoned ground beef, Mexican-style chorizo (a must for that spice!), and sometimes ham or sausage. In some regions, people even toss in chicken or beef hot dogs for a unique twist.
What makes it special is how these meats are cooked step-by-step, letting each one release its oils and infuse the next with flavor. It’s not about choosing one—it’s about the combination. Each layer adds depth, texture, and a little surprise in every bite.
What to put in discada?
While meats take the spotlight, discada shines because of its thoughtful supporting cast. The classic combo includes:
- Meats: Beef, sausage, chorizo
- Vegetables: Onions, bell peppers, tomatoes
- Aromatics & Seasonings: Garlic, cumin, black pepper, lime juice
- Optional Add-ons: Jalapeños, cilantro, avocado slices
Everything’s layered carefully in a large cooking surface, allowing flavors to build naturally. Some folks add a splash of citrus or a tomato-based broth to bring everything together. And don’t forget the tortillas—corn or flour—to wrap it all up.
Your discada recipe can be traditional, spicy, or even vegetarian. The real secret? Balance. Mix textures and flavors for that perfect bite.
What is the difference between a wok and a discada?
At a glance, a wok and a discada pan might look alike. Both are wide, round-bottomed, and great for high-heat cooking. But dig deeper and you’ll find some key differences.
A wok, rooted in Asian cooking, has a steep, bowl-like shape and is designed for quick stir-frying over concentrated heat. A discada, or disco, is shallower, made from repurposed plow discs, and has a larger flat area that’s ideal for cooking large quantities slowly and sequentially.
Another major difference? Cooking philosophy. Woks are fast and focused. Discadas are relaxed, layered, and built to feed a crowd over time. While you can use a wok to make discada, the experience—and flavor layering—is more authentic with a disc-style pan.
What is another name for a discada?
The term “discada” primarily refers to the dish itself, but it’s also used to describe the cooking method or even the pan. So, what else might you hear it called?
- Disco de arado: This literally means plow disc in Spanish, referencing the cooking surface.
- Disco pan: In some regions, people refer to the whole setup simply as a “disco.”
- Cowboy Wok: In the southwestern U.S., especially Texas and New Mexico, discada pans are often nicknamed cowboy woks due to their shape and outdoor cooking style.
- Skillet BBQ: A more modern, loose term used in fusion recipes.
No matter what you call it, if it’s cooked in a big round metal pan over flame with layers of meats and love—it’s discada.
Part 9: Conclusion and Personal Reflections
Personal Experience Trying the Discada Recipe
Cooking discada for the first time wasn’t just another kitchen experiment—it felt like a small adventure. The kind where you’re not entirely sure where the road leads, but you know it’ll be worth the trip. I’d read the history, studied the ingredients, and even watched videos of Mexican cowboys flipping sizzling meats over fire. Still, there was something humbling—and honestly, super exciting—about finally trying it in my own backyard.
First off, let me say: prepping all those meats took a bit more time than expected. Between slicing, marinating, and organizing each type of protein, I found myself double-checking my steps to make sure I didn’t mess up the order. But once that skillet hit the flame and the chorizo started sizzling, everything else faded away. That sound, that smell—pure comfort.
The biggest challenge? Not overcrowding the pan. I learned quickly that discada isn’t about rushing—it’s about respecting the process. I cooked the meats one by one, layering in flavor, just like I’d read. The smells evolved with each step—spicy, then smoky, then something sweet from the onions and tomatoes.
Tasting the final dish? Mind-blowing. It had depth, heat, brightness from the lime, and that satisfying “just one more bite” quality. Wrapped in a warm tortilla with salsa and avocado, it was everything I’d hoped for.
What surprised me most, though, was how communal it felt. Even cooking solo, the process made me feel connected—to the culture, the tradition, the land it came from. It wasn’t just a meal—it was a memory in the making.
I’ll definitely be making discada again. And next time? I’m inviting friends over. Because this dish deserves to be shared.
Encouragement to Explore and Experiment
If you’re still on the fence about trying discada, let me just say—go for it. It’s one of those dishes that welcomes your creativity. You don’t need fancy gear, just a hot pan and a bit of heart.
Start traditional, then twist it up. Add your favorite ingredients. Make it spicier, sweeter, meatier—or go vegetarian. There are no hard rules, just delicious possibilities.
Cooking discada is more than just following a recipe—it’s about storytelling, experimentation, and a little fire-kissed fun. So grab your skillet, fire it up, and let your own discada journey begin.

