
Introduction
Crafting a dessert that’s as show-stopping as it is scrumptious doesn’t have to mean spending hours in the kitchen. cheesecake ball recipe are a delightful innovation in the dessert world. These no-bake bites blend rich, creamy textures with layers of flavor and crunch, turning ordinary ingredients into magical morsels. cheesecake ball recipe Whether you’re hosting a holiday bash or looking for a unique edible gift, this guide walks you through every bite-sized detail—from ingredients and equipment to irresistible customizations and helpful storage tricks.
And guess what? I’ve personally made these cheesecake balls myself, so throughout this guide, I’ll sprinkle in real tips from my experience that’ll help you avoid rookie mistakes and wow your guests.
Part 1: Introduction to cheesecake ball recipe
Why the Cheesecake Ball Recipe Is a Game-Changer
Bite-sized, decadent, and endlessly versatile—cheesecake balls are the perfect intersection between simplicity and indulgence. Unlike traditional cheesecake, these treats skip the baking and come together in no time, making them ideal for busy schedules or last-minute get-togethers.
What makes this recipe extra special is its customizability. Want a chocolate-dipped version with a nutty crunch? You got it. Craving something fruity or gluten-free? Easy peasy. Plus, they store like a dream, meaning you can make them ahead of time and still serve them fresh and fabulous.
Another perk? They’re visually stunning, which makes them perfect for gifting, party platters, or festive displays. Think of them as dessert’s answer to gourmet truffles—but a whole lot easier to make!
History and Evolution of Cheesecake Balls
From Classic Cakes to Pop-Style Treats
It’s no secret that cheesecake has been around for centuries—dating back to ancient Greece, believe it or not! But the transformation from a full-sized cake into mini, no-bake cheesecake truffles is a fairly modern twist. Inspired by the popularity of cake pops and the rise of single-serve desserts, creative bakers began rolling cheesecake filling into balls, coating them with chocolate, nuts, or crushed cookies.
And voilà—cheesecake balls were born.
These bite-sized wonders first gained traction in food blogs and Pinterest boards, quickly becoming a hit for people looking for an elegant yet effortless dessert. Over time, recipe developers introduced all sorts of spins—everything from vegan versions to boozy bites (though we’re skipping the booze here!).
Today, they’re not just a trend—they’re a staple in the world of easy dessert recipes.
What Makes a Cheesecake Ball Recipe Stand Out?
Let’s be real: there are hundreds of cheesecake ball recipes floating around the internet. So what separates the “wow” from the “meh”?
Here’s the secret:
- Balance: Creaminess without being too dense.
- Flavor Layers: A core that’s rich and smooth, surrounded by a topping that brings crunch, tang, or sweetness.
- Texture: You want a ball that holds its shape but melts in your mouth.
- Chill Time: Properly chilled balls are easier to roll, decorate, and eat.
When I made my first batch, I noticed the difference that room-temperature cream cheese and finely crushed graham crackers made in achieving that perfect blend. Trust me, don’t skip the chilling process—ever.
Want a professional tip? Use a cookie scoop for uniform sizes—it saves time and makes your platter look polished.
What You’ll Learn in This Guide
This post doesn’t just hand you one recipe and call it a day. Instead, it offers:
- A complete ingredients breakdown with substitution tips
- Easy step-by-step instructions (with expert hacks)
- Fun flavor variations like chocolate-dipped or fruit-stuffed
- Gluten-free and vegan alternatives
- Real-life insights from my own baking experience
- Pro-level storage and serving tips
- A handy FAQ section sourced from what people also ask on Google
You’ll walk away with the confidence and know-how to make your own version of this decadent dessert—and maybe even become the go-to dessert genius among your friends and family!
Part 2: Ingredients and Equipment
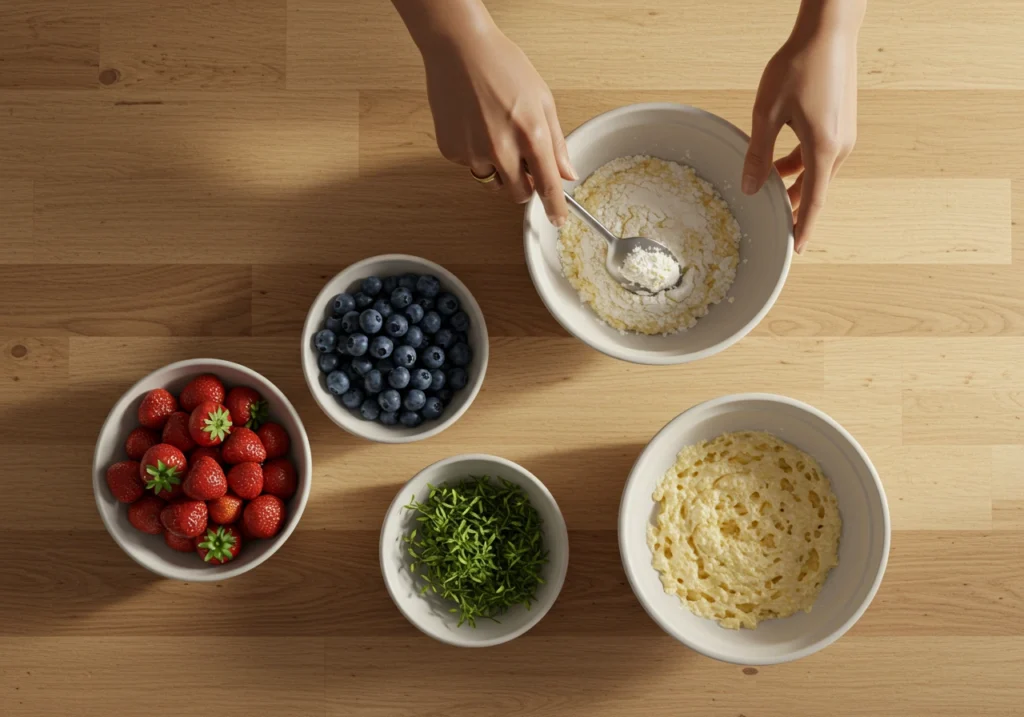
Essential Ingredients for Cheesecake Balls
To whip up the perfect cheesecake ball recipe, you’ll want to gather ingredients that are both staple and flexible. Let’s be honest—this isn’t just about following a formula. It’s about building flavor and texture layer by layer until each bite sings.
Cream Cheese: The Silky Star of the Show
The core of any delicious cheesecake ball is undeniably cream cheese. And here’s the kicker: use full-fat cream cheese. Why? Because the rich, creamy consistency of full-fat gives these dessert bites their signature lusciousness. Low-fat versions tend to water things down—literally. They can make your balls soft and prone to falling apart, which, let’s face it, isn’t ideal when you’re serving guests or prepping ahead.
Also, let your cream cheese soften at room temperature before mixing. This step ensures smooth blending and prevents those stubborn clumps that like to sneak into your batter. In my own kitchen, I leave it out for about 30–40 minutes—it spreads like a dream after that.
Sweeteners: Bringing That Sweet Tang
Now, sugar. Do you go powdered or granulated? Powdered sugar is the crowd favorite here. It dissolves effortlessly and doesn’t leave behind that grainy texture granulated sugar sometimes does.
Want a low-carb or diabetic-friendly twist? Use monk fruit, stevia, or erythritol. Just make sure to get the confectioners’ version of these so they mimic the melt-in-your-mouth texture powdered sugar brings.
Binders and Fillers: Holding It All Together
Enter: graham cracker crumbs. Not only do they add structure, but they also lend that nostalgic cheesecake flavor we all know and love. Crushed cookies like Oreos or digestive biscuits? Equally genius substitutes.
Feeling adventurous? Try finely chopped pecans or almond flour for added crunch and a nutty flair—especially if you’re aiming for gluten-free.
Flavor Enhancers: The Magic Makers
Here’s where you can really have fun. Start with a splash of vanilla extract—classic, reliable, and heavenly. But don’t stop there. Try almond extract, maple, or even coconut essence for a twist.
Zest it up! Lemon or orange zest adds brightness and complexity. I once added a dash of cinnamon with orange zest—oh wow, total winter vibes. Don’t be afraid to explore spices like cardamom or nutmeg either!
Optional Add-ins and Toppings
Once your cheesecake base is on point, it’s time to dress it up!
Chocolate Chips and Chunks
Chocolate chips are a no-brainer—but go bold. Use mini chips if you want subtle bursts, or chunky dark chocolate for rich bites. You can swirl melted chocolate into your mix too, or dip the final balls in white, milk, or dark chocolate for that “oh my gosh, did you make these?” effect.
Nuts and Dried Fruits
Crushed walnuts, pistachios, or almonds create crunch and dimension. Dried cranberries or cherries? Game changers. Just chop them finely to avoid overpowering the creaminess. And hey, if nut allergies are a concern, seeds like pumpkin or sunflower make excellent substitutes.
Sprinkles and Decorative Elements
Let your inner artist out. Rainbow sprinkles are a hit at parties, but metallic jimmies or even edible glitter can make these bites pop on a dessert table. Around the holidays, red-and-green sugar crystals are pure magic.
Necessary Kitchen Equipment
No fancy tools needed here—just the basics that make the process smoother and less messy.
Mixing Bowls and Electric Mixers
Grab a couple of mixing bowls (preferably glass or stainless steel), and use a hand or stand mixer to blend everything until it’s silky smooth. Trust me, doing this by hand will leave your arms sore and your batter inconsistent.
Scooping Tools for Uniform Sizes
A small cookie scoop is your best friend for portioning out uniform balls. This not only looks great but also ensures even chilling and coating.
Storage Containers for Chilling and Serving
You’ll need airtight containers for setting your cheesecake balls in the fridge. Line them with parchment paper so they don’t stick. And when you’re ready to serve? Transfer them to a pretty platter or even cupcake liners for a professional finish.
Part 3: Preparation Steps
Step-by-Step Guide to Making Cheesecake Balls
Alright, here’s where the fun (and a bit of mess) begins! Making a cheesecake ball recipe is way easier than baking a full-on cheesecake, but it still calls for a few key steps to get that dreamy, velvety bite. This section will guide you through the entire process from mixing to rolling to decorating—based on both best practices and my own sweet kitchen adventures.
Preparing the Cheesecake Mixture
Combining Cream Cheese, Sweeteners, and Flavorings
Start with softened full-fat cream cheese in a large mixing bowl—trust me, your life gets so much easier if you’ve let it sit at room temperature for 30 minutes. Toss in your powdered sugar, a dash of vanilla extract, and a bit of citrus zest if you’re aiming for that extra zing.
Use a hand mixer or stand mixer on medium speed to blend everything until it’s completely smooth and fluffy. You want the mixture to hold its shape when scooped but still feel light—not dense or runny. If it’s too soft, add a bit more graham cracker crumbs or cookie crumbs to thicken.
In my own kitchen, I once overmixed and ended up with something closer to a mousse. Still delicious, but definitely harder to roll! So keep an eye on the texture.
Achieving the Desired Consistency
Aim for a thick, pliable dough-like texture. It should resemble cookie dough but with a creamier feel. If it sticks to your fingers too much, chill it for a bit before shaping.
Chilling the Mixture
Recommended Chilling Times for Firmness
Pop the bowl of cheesecake mixture into the fridge for at least 2 hours—overnight if you’ve got the time. This step is essential, no skipping! Chilling firms up the mixture, making it much easier to roll and coat.
Tips to Prevent Over-Chilling
Now, don’t freeze the mixture unless you’re desperate to speed things up. Freezing too long causes it to harden unevenly, and scooping becomes a nightmare. If that happens, just let it sit at room temp for 10–15 minutes before shaping.
Forming the Balls
Techniques for Uniform Shaping
Here’s where your inner dessert artist comes alive! Use a small cookie scoop to get evenly sized portions. Roll each scoop between your palms to form smooth balls. This gives them a polished, professional look that will impress at any gathering.
Using Scoops vs. Hand-Rolling
Scoops save time and keep your portions consistent—plus, they’re cleaner. But if you want to go freehand, chill your hands with cold water before rolling; it helps prevent sticking.
When I first made these, I used just a spoon. It worked, but the shapes were… let’s say “rustic.” A scoop seriously changed my game.
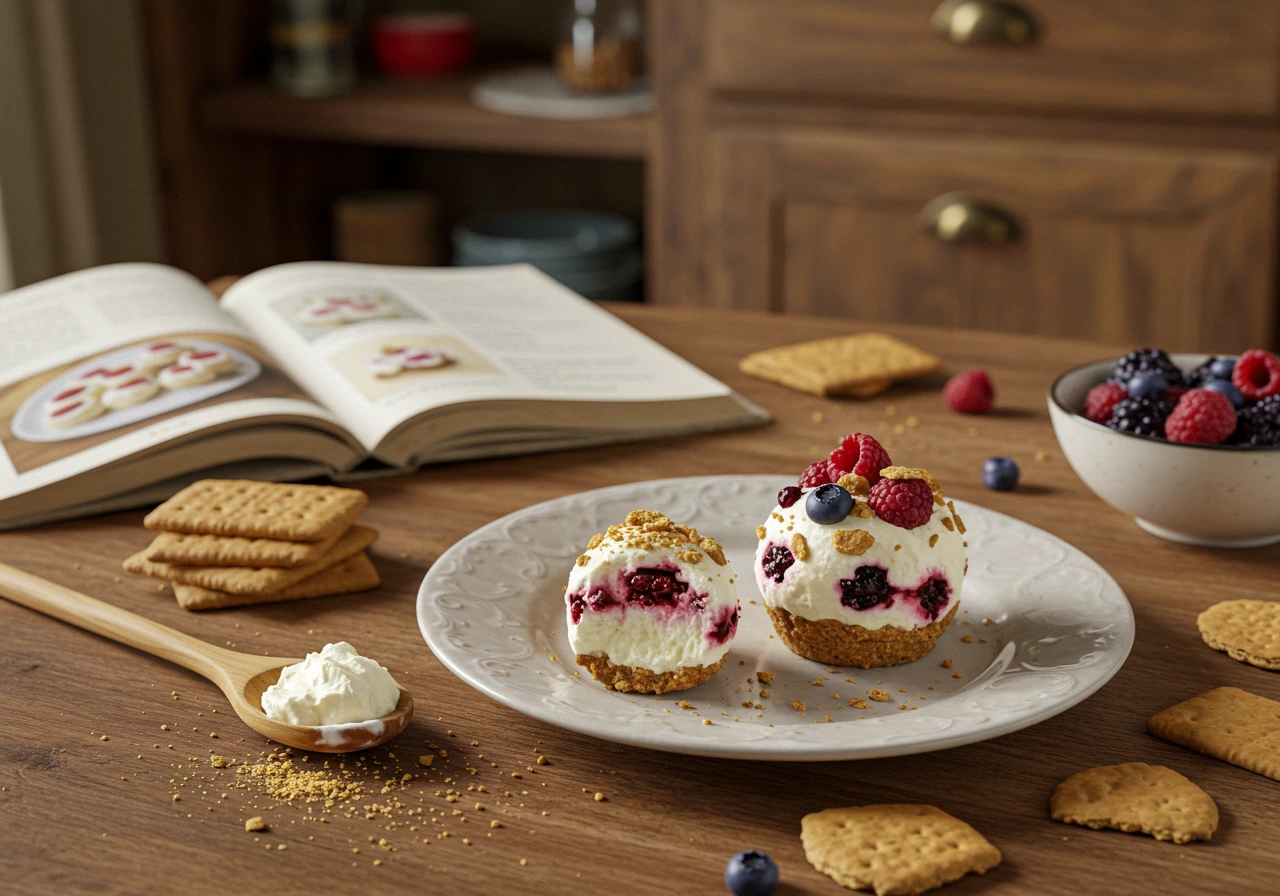
Coating and Decorating
Methods for Dipping in Chocolate or Rolling in Toppings
You’ve got two go-to routes: dip or roll.
- Dip: Melt white, milk, or dark chocolate in a heatproof bowl. Use a fork to lower the ball into the chocolate, coat evenly, then let excess drip off before placing it on parchment.
- Roll: Drop your cheesecake ball into crushed nuts, sprinkles, coconut flakes, or crushed cookies. Gently press the coating on so it sticks beautifully.
Creative Decoration Ideas for Various Occasions
Feeling festive? Use colored sugar for holidays, drizzle zigzags of chocolate for a fancy finish, or top with a single nut or candy. Around Halloween, I once added edible eyeballs—huge hit with the kids. For birthdays, edible glitter or gold dust can glam things up in seconds.
Part 4: Variations and Customizations
Flavor Variations of Cheesecake Balls
One of the best parts about the cheesecake ball recipe is how adaptable it is. Seriously, once you’ve mastered the base mixture, the possibilities are endless. Whether you’re a chocoholic, a fruit fanatic, or a nut-lover, there’s a flavor combo just waiting to win over your taste buds. Let’s break down a few of the most-loved variations that I’ve tried—and absolutely adored.
Chocolate Cheesecake Balls
Chocolate lovers, this one’s for you. You can easily transform your base into chocolate cheesecake balls by mixing in cocoa powder or melted chocolate. Personally, I love using dark cocoa powder because it brings a rich, brownie-like depth.
Another fun twist? Swirl in melted white or milk chocolate for a marbled effect. Then, coat the balls in mini chocolate chips, crushed Oreos, or dip them in more chocolate—because honestly, why not go all in?

If you’re into that silky ganache-style bite, check out tips from The Spruce Eats on how to temper chocolate like a pro.
Fruit-Infused Cheesecake Balls
For a fresher flavor profile, add a spoonful of fruit puree to your base—think strawberry, raspberry, or mango. Dried fruits like cranberries or blueberries also work beautifully. I often finely chop and mix them in to avoid messing up the texture.
Just don’t overdo the puree or you’ll end up with a too-wet mix that refuses to roll. A good trick is to stir in a bit more graham cracker or almond flour to balance out the moisture.
Nutty Cheesecake Balls
Craving something earthy and rich? Fold in nut butters like almond or peanut butter for an extra creamy twist. Or, go for chopped pecans, walnuts, or pistachios for a crunchier texture.
Part 5: Serving and Storage
Serving Suggestions
You’ve rolled, dipped, decorated—now comes the fun part: serving your cheesecake balls in a way that wows. These treats don’t just taste amazing—they look like gourmet bites, so why not make them shine?
Ideal Serving Temperatures
Cheesecake balls are best served slightly chilled. Not straight-from-the-fridge cold, but not room temperature either. Let them sit out for about 10–15 minutes before serving. This softens them just enough to bring out that rich, creamy texture without turning them into a melty mess.
On hot days, keep a cool serving tray or chilled platter underneath them if they’re sitting out at a party.
Pairing with Beverages or Other Desserts
These bite-sized beauties pair wonderfully with coffee, tea, or hot cocoa. For a more indulgent pairing, try them with a sweet dessert board that includes berries, chocolate bark, and mini tarts.
They’re also stellar alongside a fruit dip or as a sweet ending to a cheese platter—yes, the contrast works like magic!
Presentation Ideas for Parties and Gatherings
Get playful with presentation. Place each ball in a mini cupcake liner for a clean, polished look. Arrange them on tiered trays, group them by flavor, or drizzle them with contrasting chocolate to create a rainbow of dessert goodness.
During holidays, use colored sprinkles or edible glitter to match the theme. Want to really elevate the look? Add a tiny flag or toothpick sign with flavor labels—it’s cute and helpful.
For more creative inspo, The Spruce Eats has a fantastic collection of ideas on dessert table styling.
Storage and Shelf Life
Once your cheesecake balls are made, here’s how to keep them tasting fresh and fabulous.
Refrigeration Guidelines
Store the cheesecake balls in an airtight container in the fridge. Separate layers with parchment paper to avoid sticking. They’ll stay good for up to 5 days, but the earlier you serve them, the creamier and fresher they’ll taste.
I like to chill mine overnight before serving—they firm up perfectly and the flavors deepen a bit, which is chef’s kiss.
Freezing Options and Thawing Instructions
Yes, you can freeze cheesecake balls! Place them on a baking sheet to freeze individually first, then transfer to a freezer-safe bag or container. They’ll last up to 2 months.
When ready to serve, thaw them in the fridge overnight. Don’t microwave them—slow thawing keeps the texture intact.
Signs of Spoilage to Watch For
If they develop a sour smell, start to feel slimy, or look cracked and overly dry, it’s time to toss them. Always check your toppings too—nuts and fruits can spoil faster.
Part 6: Frequently Asked Questions (FAQs)
What can go wrong when making cheesecake?
While cheesecake balls are easier than baked cheesecakes, a few things can still go south. One common issue is using cold cream cheese, which leads to a lumpy mixture—so always soften it first. Another problem? Not chilling the mixture long enough. Without proper chilling, the balls won’t hold their shape and can turn sticky or too soft to handle. Overmixing the base can also cause it to be too airy and loose. Lastly, adding too much liquid flavoring or fruit puree may thin out the consistency and prevent firming, so it’s crucial to balance your wet and dry ingredients.
How to thicken cheesecake balls?
If your cheesecake mixture turns out too soft or runny, don’t panic—it’s fixable! The quickest solution is to add more graham cracker crumbs, cookie crumbs, or even finely crushed nuts to soak up the excess moisture. If you’re using fruit puree, reduce the amount or add extra dry ingredients like powdered sugar or coconut flakes. Then, chill the mixture for at least 2–3 hours. Cold is your friend here—it helps firm everything up beautifully. Avoid adding flour or cornstarch, as they can alter the flavor and texture in not-so-yummy ways.
What is the secret to a good cheesecake?
Whether baked or rolled into bite-sized balls, the secret lies in the balance. You need smooth, full-fat cream cheese, just enough sweetener, and a flavor that doesn’t overpower. But here’s the kicker: texture. A great cheesecake ball should be dense enough to hold shape, yet light enough to melt in your mouth. Softening your ingredients properly and mixing until just combined helps maintain that luscious consistency. And don’t rush the chill time! Letting the flavors develop while the mixture firms up in the fridge turns a good dessert into an unforgettable one.
Can you freeze cheesecake balls?
Absolutely! Cheesecake balls freeze surprisingly well, making them a perfect make-ahead treat. First, place them on a baking sheet and freeze until solid—this prevents sticking. Then, transfer them to a sealed container or freezer bag, separating layers with parchment paper. They’ll stay fresh for up to 2 months. To serve, just transfer to the fridge the night before and allow them to thaw gradually. Avoid thawing at room temperature as condensation may ruin the coating. Frozen cheesecake balls also make a refreshing treat straight from the freezer, especially on warm days!