
Chocolate Cake Recipe from Scratch Easy Halloween
This article introduces a deeply indulgent, incredibly simple, and family-favorite dessert idea that’s perfect for spooky season. We’re diving fork-first into a rich and moist chocolate cake recipe from scratch that’s not only easy to whip up but also screams Halloween in every bite. Whether you’re hosting a party, baking with kids, or just indulging your sweet tooth, this complete guide has everything you need to haunt your kitchen with flavor. Let’s get those whisks ready and turn flour into festive magic!
Introduction to Chocolate Cake Recipes for Halloween
Why Chocolate Cake is a Halloween Classic
Halloween’s not just about the costumes and candy—though we’ll gladly take both! It’s also the perfect excuse to bake something decadent, dark, and delicious. A chocolate cake recipe from scratch fits right in, with its rich flavors and dark hue echoing the spooky vibes of the season. In fact, the bitterness of cocoa paired with silky frosting creates a treat that’s indulgent enough for grown-ups, but still totally adored by kids.
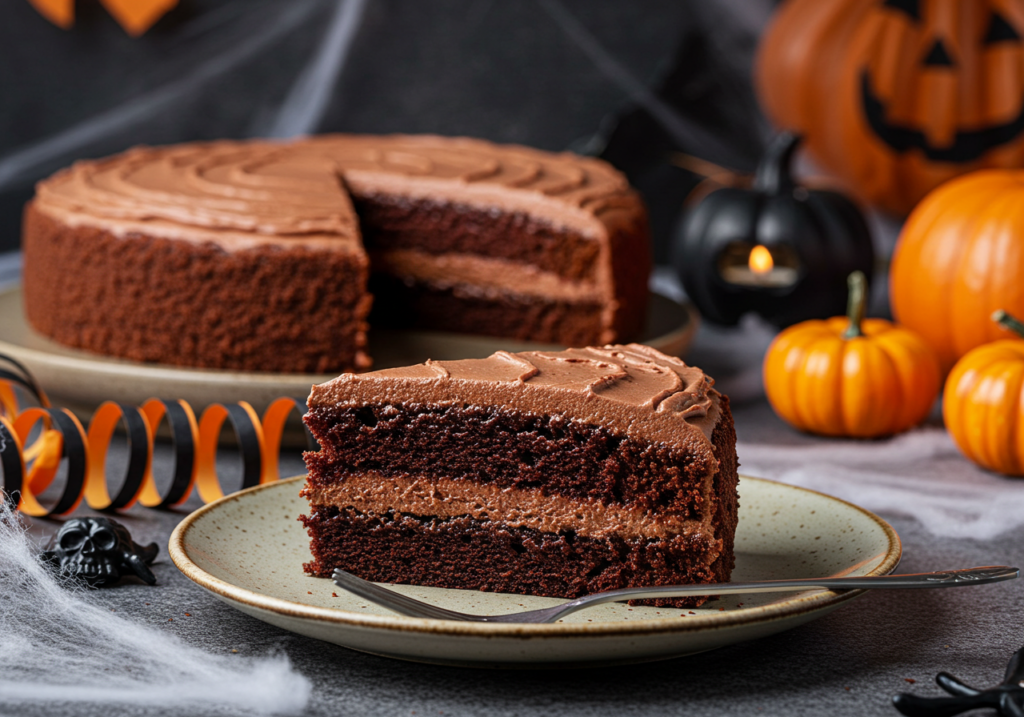
Plus, think about it: What dessert better complements Halloween’s color palette than deep brown layers topped with orange and black decorations? Right—none!
Benefits of Baking from Scratch for Festive Occasions
Baking from scratch might sound like a chore, but trust me, it’s where all the magic happens. Unlike store-bought mixes, homemade recipes give you complete control over flavor, texture, and most importantly—ingredients. Want to make it dairy-free? Go ahead. Need it gluten-free? Easy fix. Craving extra chocolate chips? Throw them in!
Moreover, the process itself becomes part of the celebration. Kids love measuring, mixing, and sneaking spoonfuls of batter. Adults appreciate knowing exactly what’s in their food. And honestly, nothing beats the smell of a freshly baked cake filling your home. It’s the cozy scent of autumn and childhood memories rolled into one.
What to Expect From This Halloween Cake Guide
In this spook-tacular guide, you’ll discover:
- The full ingredient list with tips on substitutions
- A foolproof method to make moist cake layers every time
- Silky chocolate frosting that’s rich but not overpowering
- Easy Halloween decoration ideas (no pro tools needed!)
- Tips for customizing the cake for dietary needs
- Storage, freezing, and serving suggestions
- Plus answers to your top FAQs about baking Halloween cakes
Oh, and spoiler alert: I tried this exact recipe. From beating the batter to watching it rise perfectly golden in the oven—it worked like a dream. And the spooky decorations? A total hit at our costume night!
So if you’re itching to whip up something spectacular this Halloween, this easy chocolate cake from scratch is your best bet. Let’s get our spooky bake on!
Understanding the Basics of a Classic Chocolate Cake
Essential Ingredients and Their Roles
Before we summon the spirits of sweetness, it’s crucial to understand the basic ingredients that make chocolate cake shine:
- Flour: The sturdy skeleton of your cake. All-purpose flour is best here.
- Cocoa Powder: This gives the cake its bold chocolate flavor. Go with unsweetened for full control over sweetness.
- Sugar: White granulated sugar sweetens the deal while also helping with texture.
- Eggs: These bind everything together like magic. They also add richness and help the cake rise.
- Baking Powder & Soda: They’re your rising agents—don’t skip them unless you want a chocolate pancake.
- Oil or Butter: Keeps everything moist and tender. We prefer oil for a lighter crumb.
- Milk or Buttermilk: Adds moisture, softens the texture, and complements the cocoa.
These ingredients come together like witches around a cauldron, creating the perfect chocolate cake base that you can dress up however Halloween demands.
Fundamental Baking Techniques for Beginners
If you’re new to baking, fear not! This isn’t The Great British Bake Off. We’re keeping it simple, yet totally effective:
- Sift the dry ingredients: It may sound old-school, but this step keeps lumps away and ensures even distribution.
- Room temperature ingredients: Eggs and milk straight from the fridge can mess with the batter. Let them sit out for 15–20 minutes before using.
- Don’t overmix: It’s tempting, but too much mixing makes the cake dense. Stop when everything is just combined.
- Use the toothpick test: If it comes out clean or with a few moist crumbs, your cake’s done baking.
Part 2: Detailed Chocolate Cake Recipe from Scratch
Ingredients Needed for the Chocolate Cake
Alright, spooky bakers, it’s time to summon your ingredients! When crafting a chocolate cake recipe from scratch—especially for an easy Halloween treat—you want to use fresh, quality basics. This cake brings together pantry staples in a way that guarantees rich flavor and a moist, melt-in-your-mouth texture.
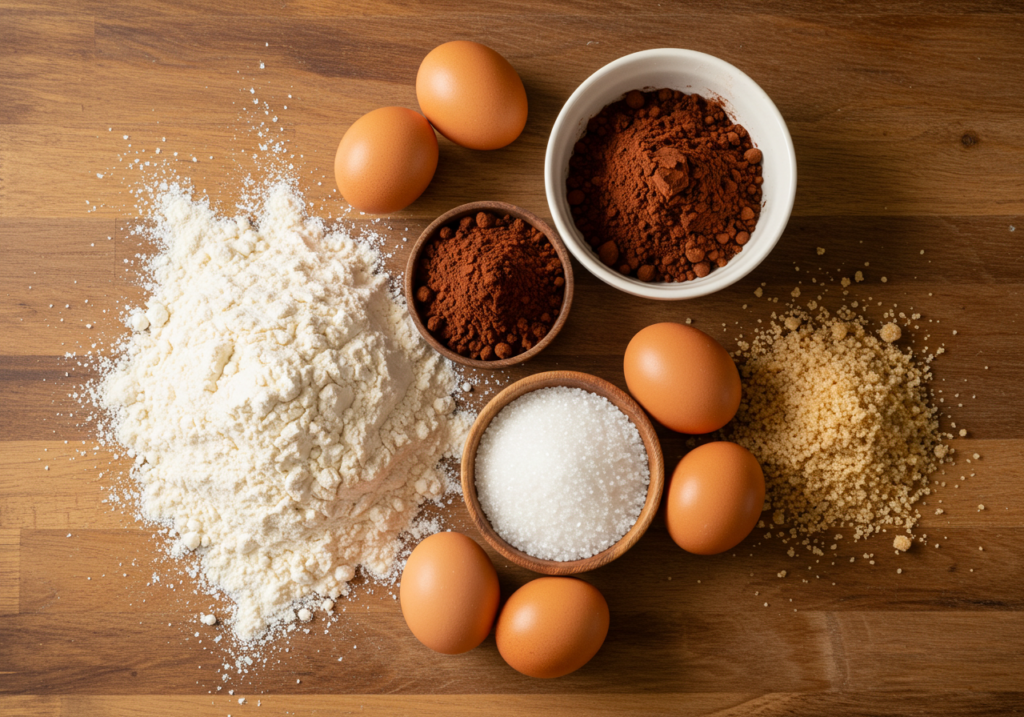
Dry Ingredients
These are the bones of your cake—structure and flavor depend on getting these just right.
- All-purpose flour – The sturdy base, sifted for fluffiness
- Unsweetened cocoa powder – Go for Dutch-processed for a deeper flavor
- Baking powder & baking soda – Both work together to create a tender rise
- Salt – Just a pinch to balance sweetness and enhance the chocolate
Wet Ingredients
Now, let’s mix in the magic—these provide richness, moisture, and depth.
- Granulated sugar – Sweetens and softens the crumb
- Eggs – Add structure and richness
- Whole milk – Makes the cake moist without weighing it down
- Vegetable oil – Keeps the cake soft even when chilled
- Vanilla extract – Rounds out the cocoa flavor with aromatic warmth
- Boiling water – This blooms the cocoa and deepens the chocolatey goodness
Pro Tip: Always use room-temperature ingredients for better emulsification.
Step-by-Step Instructions for Baking the Cake Layers
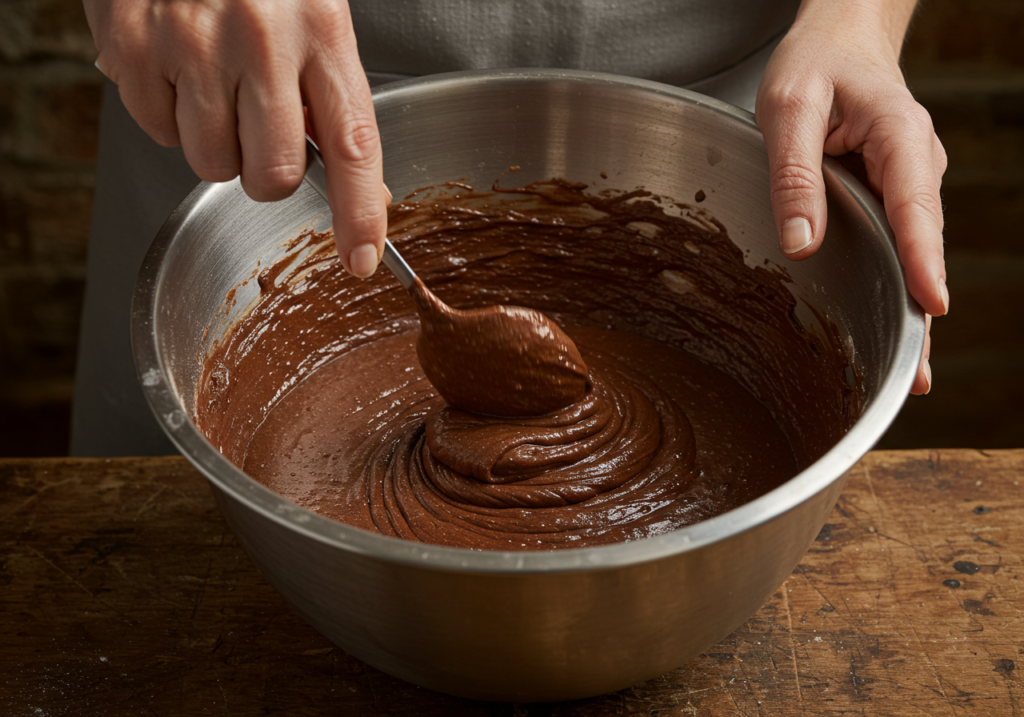
Preparing the Batter
First things first, preheat your oven to 350°F (175°C). This way, it’s nice and hot when you’re ready to bake.
- Sift the dry ingredients into a large mixing bowl. This includes the flour, cocoa powder, baking soda, baking powder, and salt. Sifting prevents clumps and aerates your batter, helping your cake rise evenly.
- In a separate bowl, whisk together the wet ingredients: sugar, eggs, milk, oil, and vanilla. Once combined, slowly add the wet mixture to the dry bowl.
- Then, the secret weapon—boiling water. Pour it in last and mix until smooth. The batter will be thin, and that’s exactly what you want. A thinner batter leads to a lighter, moister cake.
Don’t overmix—just stir until the flour is incorporated. Too much stirring? That’s how you end up with a dense cake. No thanks.
Baking Process
- Grease and flour two 9-inch round cake pans, or line them with parchment circles.
- Pour the batter evenly between the two pans. You can use a kitchen scale for precision, or eyeball it if you’re feeling confident.
- Tap the pans gently on the counter to pop any air bubbles.
- Bake for 30–35 minutes, but don’t wander too far! Around the 28-minute mark, poke the center with a toothpick. If it comes out clean or with just a few crumbs, it’s done.
- Let the cakes cool in the pans for 10 minutes before flipping them onto a wire rack.
🎃 The aroma alone will have the whole house trick-or-treating in your kitchen!
Preparing the Chocolate Frosting
This luscious frosting takes the cake from delicious to downright irresistible. Rich, fluffy, and oh-so-easy—this is the icing on your Halloween masterpiece.
Ingredients for the Frosting
- Unsalted butter (1 cup) – Softened at room temp
- Powdered sugar (3 cups) – Sifted for smoothness
- Cocoa powder (¾ cup) – Unsweetened, to deepen the flavor
- Heavy cream (¼–½ cup) – For silky texture and spreadability
- Vanilla extract (1 tsp) – Adds warmth and dimension
Mixing and Achieving the Desired Consistency
- Beat the softened butter for 2–3 minutes until pale and fluffy.
- Gradually add the sifted cocoa powder and powdered sugar, alternating with splashes of cream.
- Stir in vanilla extract, then whip on high speed for a full minute. You want a texture that’s smooth, pipeable, and dreamy.
Need it thinner? Add more cream. Too thin? A bit more sugar will stiffen it right up.
For an extra spooky twist, toss in a few drops of orange gel food coloring and swirl it with the chocolate for a creepy marble effect.
Assembling and Frosting the Cake
Finally, it’s showtime.
Leveling and Stacking Cake Layers
- If your cakes domed on top, use a serrated knife to gently level them off.
- Place one layer on a cake board or serving platter.
- Add a thick layer of frosting and spread evenly.
- Stack the second layer on top. Press down gently to make it even.
Applying Crumb Coat and Final Frosting Layer
- Cover the entire cake with a thin layer of frosting. This is your crumb coat—it locks in stray crumbs and gives a clean base for the final coat.
- Chill the cake for 20 minutes to set.
- Once firm, slather on the remaining frosting using a spatula. Go for smooth or spooky texture—your call!
Part 3: Halloween-Themed Decorations
Designing a Halloween Theme for Your Cake
When it comes to your chocolate cake recipe from scratch easy Halloween edition, it’s all about the theme. Sure, the cake is mouthwatering on its own, but dressing it up in festive fright? That’s where the real fun begins.
Incorporating Traditional Halloween Colors and Symbols
Start by tapping into the classic Halloween palette—orange, black, purple, green, and white. You can use colored frostings, candies, sprinkles, and food-safe glitter to bring your haunted vision to life. Orange evokes pumpkins and autumn leaves, while black gives that spooky edge. Add green or purple for a witchy twist.
Don’t forget the iconic symbols of Halloween:
- 🎃 Pumpkins (fondant or piped)
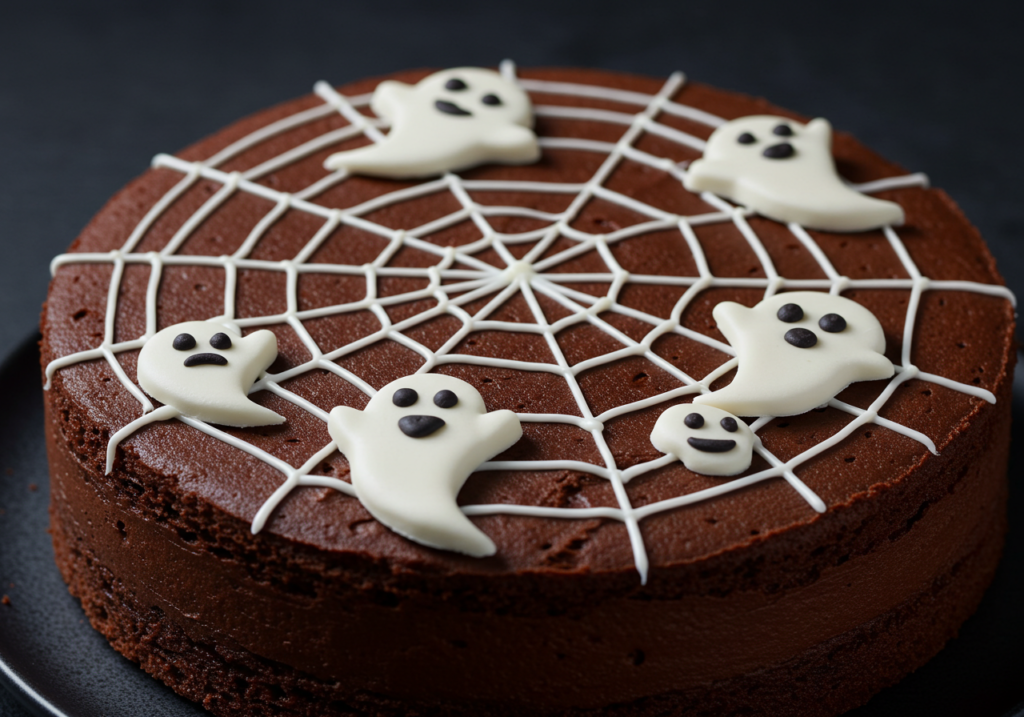
- 👻 Ghosts (marshmallows or white chocolate)
- 🕷️ Spiders and webs (licorice or piped icing)
- 🧙 Witch hats or broomsticks (edible toppers)
Using these elements adds instant personality and turns a basic bake into a party showstopper. No need to be a pro decorator—just have fun and let the holiday spirit guide your hands!
Easy Decoration Ideas
Whether you’re short on time or just starting out, these simple ideas pack serious wow-factor with minimal effort.
Using Fondant and Edible Decorations
Pre-made fondant is your new best friend. Roll it out and use small cookie cutters or a sharp knife to cut out bats, tombstones, or jack-o’-lanterns. Attach them to the cake using a dab of frosting. You can also shape freehand figures like little mummies or black cats—adorably creepy!
Sprinkle on edible confetti, colored sugar crystals, or mini candy eyeballs. Bonus: edible glitter in orange or black adds a glam twist, and it makes the cake shimmer in candlelight.
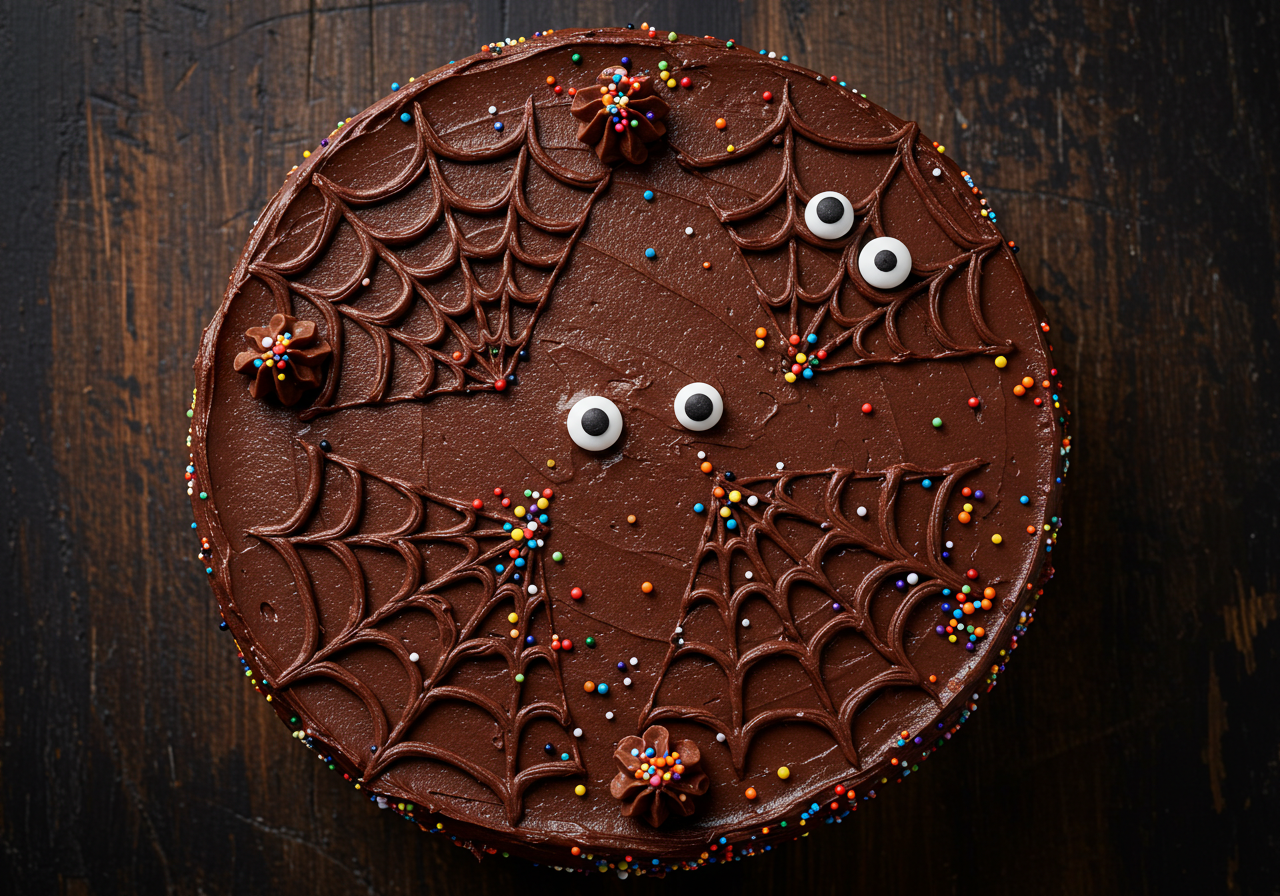
Creating Spider Web Designs with Icing
Spider webs are a cinch with a bit of white royal icing or melted white chocolate. Here’s how:
- Pipe three concentric circles on top of the cake using a fine-tipped piping bag.
- Using a toothpick, drag lines from the center outward—like spokes on a wheel.
- Boom! Instant spider web.
If you’re feeling fancy, pipe a little spider in the corner using black icing or drop a licorice candy “spider” on top. Easy, spooky, and totally Instagram-worthy.
Need inspo? Check out this web-topped cupcake trick and adapt it for your cake—it’s fuss-free and freakishly cute!
Advanced Decoration Techniques
For those ready to kick things up a notch, these more advanced tricks will truly bewitch your guests.
Crafting Fondant Figures (e.g., Ghosts, Pumpkins)
Creating fondant decorations might sound intimidating, but trust me—it’s actually a blast. Here’s how to get started:
- Mini ghosts: Roll white fondant into small balls. Flatten into circles and drape over marshmallows or mini cones. Dot on eyes with edible marker or black gel icing.
- Pumpkins: Form orange fondant into small spheres, use a knife to carve vertical lines, and top with a green fondant “stem.”
- Witch hats: Use black fondant to shape a cone and attach it to a round base. Add a purple band for detail.
Store your figures overnight in an airtight container, and let them set a bit so they keep their shape on the cake.
Utilizing Piping Techniques for Intricate Designs
Advanced decorators, this one’s for you! Load up your piping bag with colored buttercream or royal icing and try:
- Rosettes in spooky shades for the cake’s edge
- Lace-style spider webs around the sides
- Drip effects using ganache dyed blood-red or slime green
- Skeleton hands or bones piped onto the top in white icing
Use fine tips (like Wilton #1 or #2) for detailed outlines and accents. Want drama? Try a black drip glaze with metallic sprinkles for that glam-goth look.
Don’t be afraid to experiment. Halloween is the one time of year when messy can be marvelous.
Part 4: Variations and Dietary Considerations
Alternative Ingredients for Dietary Restrictions
Just because you’re working with dietary needs doesn’t mean you need to miss out on this delicious chocolate cake recipe from scratch easy Halloween-style. In fact, with a few thoughtful swaps, you can make your cake inclusive and just as decadent.
Gluten-Free Flour Options
If gluten’s the problem, no sweat! Swap the all-purpose flour with a 1:1 gluten-free baking blend. These blends usually contain rice flour, potato starch, and xanthan gum—which mimics the elasticity of gluten. Make sure you sift it well to avoid clumps and keep the texture light.
You can also try almond flour for a slightly nutty flavor or oat flour for extra moisture. Just be cautious with ratios: almond flour is heavier, so you may need to adjust your leavening agents slightly.
Pro Tip: Always check your baking powder and cocoa to ensure they’re certified gluten-free, too!
Dairy-Free Milk and Butter Substitutes
Whether you’re lactose intolerant, vegan, or just avoiding dairy, there are easy workarounds that don’t sacrifice taste or texture.
- Milk Alternatives: Oat milk is creamy and bakes beautifully. Almond milk is lighter and slightly nutty, while soy milk adds protein and structure.
- Butter Replacements: Use plant-based margarine or solid coconut oil (unrefined for a hint of coconut flavor). You could also try vegan butter brands like Earth Balance for that rich, buttery flavor.
Honestly? I tried this cake using oat milk and olive oil—and it was still ultra-moist and rich. You’d never know it was dairy-free.
Flavor Variations to Enhance the Cake
Let’s say you’ve mastered the base recipe (go, you!) and want to shake things up. Whether you’re aiming to impress or just craving something unique, these simple tweaks can level up your Halloween chocolate cake from good to unforgettable.
Incorporating Orange Zest or Extract for a Citrus Twist
Orange and chocolate? A match made in flavor heaven. Adding 1 teaspoon of orange extract or the zest of a whole orange into your batter creates a bright, citrusy undertone that beautifully complements the richness of the cocoa.
This combo feels especially festive in autumn, bringing a little zing to each bite. You can even sprinkle some zest over the frosting for added fragrance and visual pop.
Adding Spices like Cinnamon or Nutmeg for Warmth
For a cozy, fall-inspired twist, blend in ½ teaspoon of cinnamon or a pinch of nutmeg with your dry ingredients. These warm spices make your cake feel like a hug in every slice—perfect for chilly Halloween nights.
Want even more depth? Add a smidge of clove or ginger for a spiced, chai-like vibe that tastes like Halloween in cake form.
Part 5: Serving and Storing the Cake
Serving Suggestions
You’ve baked, frosted, and decorated your chocolate cake recipe from scratch easy Halloween style—now it’s time to show it off and serve it like a star.
Pairing with Complementary Beverages
Serve this decadent cake with drinks that complement its richness. For kids or non-coffee lovers, a warm cup of spiced apple cider or creamy oat milk hot chocolate is a perfect match. For the grown-up crowd, dark roast coffee or a pumpkin spice latte adds warmth and a beautiful flavor contrast to the sweet, chocolatey bite.
Presentation Tips for Halloween Parties
Don’t just plop your cake on a plate—make it party-ready! Place it on a black cake stand, scatter candy eyeballs or gummy worms around the base, and light some LED tea lights nearby for a creepy glow. Want to get extra festive? Add a mini plastic skeleton or witch’s hat as a topper!
Your guests will be snapping pics before they even grab a fork!
Storing Leftover Cake
Although it’s hard to imagine having leftovers with this cake, let’s be real—you might want to save a slice or two for later (or breakfast 👀).
Proper Storage Techniques to Maintain Freshness
Cover the cake tightly with plastic wrap or store it in an airtight container at room temperature for up to 3 days. If it’s frosted with buttercream, you can refrigerate it, but make sure to bring it back to room temp before serving—it tastes way better that way.
Freezing Options for Extended Shelf Life
Wanna freeze it? Totally doable. Wrap individual slices in plastic wrap, then foil, and pop them into a zip-top freezer bag. They’ll stay fresh for up to 2 months. When that midnight chocolate craving hits, just thaw a slice in the fridge or zap it in the microwave for a quick fix.
Part 6: Frequently Asked Questions (FAQs)
How to make the easiest chocolate cake?
The easiest chocolate cake comes down to a few golden rules—simple ingredients, one-bowl mixing, and zero fuss. That’s exactly what this chocolate cake recipe from scratch easy Halloween version delivers. No fancy equipment, no exotic ingredients—just pantry basics and about 10 minutes of prep. Mix the dry ingredients, add the wet, pour, bake, and boom—you’ve got a rich, moist masterpiece.
Using boiling water in the batter is a sneaky little trick that bloom the cocoa, intensifying the chocolate flavor while making the batter smooth and pourable.
What is the easiest cake to make?
If you’re a beginner or just short on time, chocolate cakes with oil-based batters (like this one) are your best friend. Why? No creaming butter, no temperamental steps—just mix and go. Cakes without multiple layers or complex frosting also reduce the chance of goofs.
This Halloween-inspired cake uses a simple chocolate buttercream and basic decor ideas, so even if you’re a first-timer, you’ll feel like a pro. Plus, it’s very forgiving if your frosting game isn’t perfect—just say the smudges are part of the spooky theme!
What makes a chocolate cake moist and fluffy?
Ah, the golden question. Moisture comes from the right fat and liquid ratio. In this recipe, vegetable oil trumps butter for softness, while eggs and milk add richness. The boiling water, again, plays a major role by dissolving the cocoa and giving the batter a smooth, luxurious texture.
Fluffiness? That’s where baking soda and powder step in. Combined with proper mixing (not overdoing it), they create air pockets that help the cake rise evenly and stay tender.
What is the secret to super moist cake?
Want a super moist, never-dry cake? It’s all about balance. Stick to oil instead of butter, add enough liquid (like milk or even sour cream), and never overbake. One minute too long in the oven, and your cake can dry out fast. Always test with a toothpick around the 28-minute mark and pull it out when there’s no wet batter—just a few moist crumbs.
Lastly, let your cake cool properly before storing. Trapped steam can create soggy tops and dry bottoms. Treat your cake right, and it’ll stay luscious for days.