
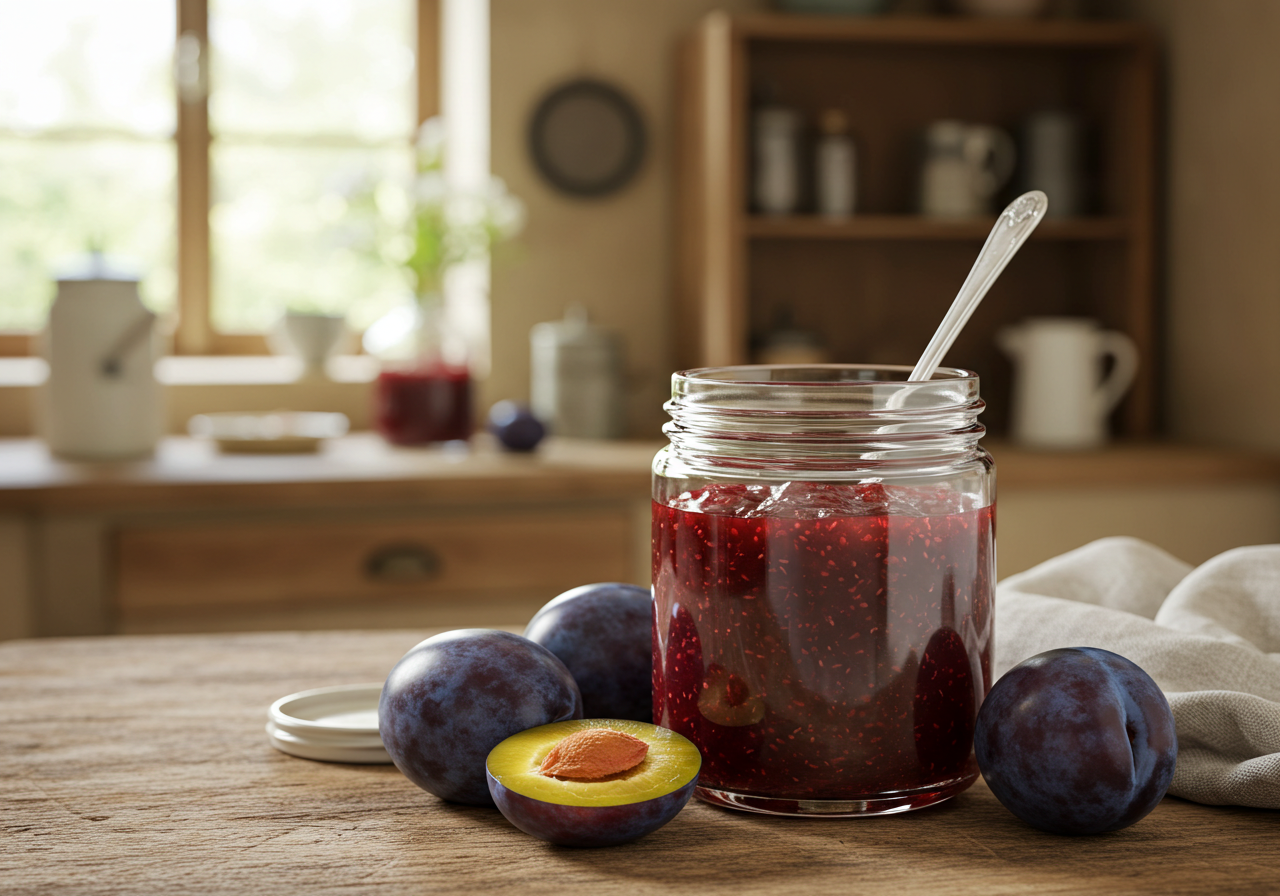
Introduction
Who doesn’t love a jar of sweet, homemade plum jelly sitting on the kitchen shelf, ready to spread over a warm piece of toast? There’s something deeply satisfying about making your own fruit preserves—especially when using fresh, ripe plums at the peak of their season. This guide will take you step by step through an easy-to-follow plum jelly recipe, complete with tips, troubleshooting advice, and creative serving ideas.
Making plum jelly isn’t just about preserving fruit; it’s about capturing a burst of summer flavors in a jar. With the right balance of tartness and sweetness, a good jelly is smooth, glossy, and full of fruity depth. Whether you’re a first-time canner or a seasoned pro looking for a foolproof plum jelly recipe, this guide has everything you need.
We’ll cover ingredient selection, the role of pectin, cooking techniques, storage methods, and more. By the end, you’ll have a kitchen filled with the delicious aroma of simmering plums and a collection of jars ready to be gifted or enjoyed.
So, let’s dive in—starting with the basics of plum jelly and why making it from scratch is totally worth it!
Part 1: Introduction to Plum Jelly
What is Plum Jelly?
Plum jelly is a fruit preserve made by extracting the juice from plums, mixing it with sugar, and allowing it to set into a translucent, flavorful spread. Unlike plum jam, which includes fruit pulp, plum jelly is silky smooth and free of solid fruit pieces. This makes it ideal for spreading over toast, biscuits, or even using as a glaze for roasted meats.
One of the best things about homemade plum jelly is that it lets you control the ingredients, avoiding artificial preservatives and excessive sweetness. Plus, it’s a great way to use up an abundance of fresh plums when they’re in season!
A Brief History of Plum Jelly
Did you know that plum jelly dates back centuries? Preserving fruit in sugar has long been a method to extend its shelf life before refrigeration was a thing. In different cultures, plum-based preserves have been enjoyed for generations, from European marmalades to Asian plum sauces.
Plums are naturally high in pectin, a fiber that helps jellies achieve that perfect, spoonable texture. That’s why they’ve been a favorite for jelly-making for so long.
Why You Should Make Your Own Plum Jelly
Making homemade plum jelly isn’t just about having a tasty spread—it’s about knowing exactly what goes into your food. Here’s why you should give it a try:
- No artificial additives – Unlike store-bought jellies, you get to control the ingredients.
- Customizable flavors – Want a hint of cinnamon? A touch of vanilla? Go for it!
- Preserve seasonal fruit – Plums are best in summer, and making jelly lets you enjoy their flavor year-round.
- A fun, rewarding process – There’s something incredibly satisfying about canning your own food and seeing those jars neatly lined up in your pantry.
Part 2: Understanding the Ingredients
Before you start making your homemade plum jelly, it’s essential to understand the ingredients that make it all come together. From selecting the right type of plums to balancing sweetness and acidity, every element plays a crucial role in achieving that perfect, smooth consistency.
One of the most important factors is pectin, the natural or added ingredient that helps the jelly set properly. Without the right balance of pectin, sugar, and acid, you could end up with runny or overly firm jelly—and nobody wants that!
So, let’s break it down and choose the best ingredients for a jelly that’s vibrant, flavorful, and perfectly spreadable.
Selecting the Right Plums
Not all plums are created equal when it comes to jelly-making. Some varieties contain more pectin, while others have a higher natural sugar content. The best plums for jelly should be juicy, flavorful, and slightly tart, as this enhances the final product’s bright, fruity taste.
Types of Plums Suitable for Jelly
Plums come in two main categories, and each type brings something unique to your jelly:
- European Plums (Prunus domestica) – These tend to be smaller, firmer, and sweeter. They contain higher pectin levels, making them ideal for natural-setting jellies without added pectin.
- Common varieties: Italian Prune Plums, Damson Plums, Greengages
- Best for: Jellies with a naturally thicker consistency
- Japanese Plums (Prunus salicina) – Larger, juicier, and more delicate, these plums often have lower pectin levels, meaning you may need to add commercial pectin. They create a softer, silkier jelly with a bright, tangy flavor.
- Common varieties: Santa Rosa, Black Amber, Elephant Heart
- Best for: Sweeter, softer jellies with a bright, juicy taste
Importance of Ripeness
The ripeness of your plums significantly affects the flavor and pectin content of your jelly.
- Underripe plums (slightly firm, tart) – These contain more natural pectin, which helps the jelly set better.
- Ripe plums (soft, juicy, fully sweet) – These offer better flavor but have less pectin, requiring commercial pectin if using Japanese plums.
- Overripe plums (very soft, mushy) – These are great for flavor but lack pectin, making them tricky for jelly-making.
💡 Pro Tip: To get the best of both worlds, use a mix of slightly underripe and ripe plums. This gives you both pectin for setting and sweetness for flavor without needing too much added sugar.
Role of Pectin in Jelly Making
Pectin is the magic ingredient that turns plum juice into jelly. Without it, your jelly would remain a runny syrup instead of a spreadable delight.
Natural Pectin in Plums
Plums naturally contain pectin, but the amount varies depending on variety and ripeness. European plums typically have higher pectin, which means you may not need to add commercial pectin.
How does pectin work? When mixed with sugar and acid (like lemon juice), pectin creates a gel-like structure that thickens the jelly. However, if you use low-pectin plums, you may need to add commercial pectin for a firm set.
Using Commercial Pectin
If you’re using low-pectin plums (like Japanese varieties), you’ll need to add store-bought pectin to help your jelly set. There are two main types of commercial pectin:
- Powdered Pectin – Mixes well with sugar and is added at the beginning of the cooking process.
- Liquid Pectin – Added at the end of cooking, making it convenient but slightly less customizable.
💡 Pro Tip: If you prefer natural pectin, you can also add a few underripe apples or citrus peels while boiling your plum juice. These ingredients are naturally high in pectin and can help your jelly set without commercial additives.
Balancing Sweetness and Acidity
Achieving the perfect balance of sweetness and acidity is what makes plum jelly truly delicious. Too much sugar can overpower the bright fruit flavors, while too much acid can make it too tart.
Sugar’s Function Beyond Sweetness
Sugar isn’t just there to sweeten the jelly—it also plays an important role in preservation and texture:
- Preserves the jelly by preventing microbial growth.
- Enhances the natural fruit flavor and prevents it from tasting “flat.”
- Works with pectin to help the jelly set properly.
While traditional plum jelly recipes use a 1:1 fruit-to-sugar ratio, you can reduce sugar slightly if using high-pectin plums. However, cutting sugar too much can prevent proper setting and lead to a runny consistency.
💡 Pro Tip: If you prefer low-sugar jelly, use low-sugar pectin, which allows the jelly to set with less sugar or even alternative sweeteners.
Incorporating Acidity
Acidity is key to achieving a well-balanced jelly. It enhances flavor, helps preserve the jelly, and ensures proper setting when combined with pectin.
The easiest way to add acidity is by using lemon juice. Here’s why it’s essential:
- Activates pectin to ensure the jelly thickens.
- Balances sweetness and brightens the fruit flavor.
- Prevents crystallization in the jelly over time.
💡 Pro Tip: For best results, always use fresh lemon juice, as bottled versions may contain preservatives that affect the setting process.
Key Takeaways from Part 2
Choose the right plums – European plums for high pectin, Japanese plums for juicy, softer jellies.
Mix underripe and ripe plums for optimal pectin and flavor balance.
Pectin is essential for setting – use natural pectin in plums or commercial pectin if needed.
Sugar preserves, enhances flavor, and helps set the jelly.
Lemon juice is crucial for both flavor balance and proper gel formation.
Part 3: Equipment and Preparation
Before you dive into making homemade plum jelly, it’s crucial to gather the right tools and properly prepare your jars. Using the correct equipment ensures a smooth cooking process, while sterilized jars help keep your jelly fresh, safe, and long-lasting.
From large pots for cooking to jelly strainers for a silky-smooth texture, every tool plays an essential role. And let’s not forget proper jar sterilization, which is non-negotiable when it comes to preserving food safely.
Let’s go step by step to make sure you’re fully equipped for the perfect plum jelly-making experience!
Essential Equipment for Jelly Making
Having the right tools makes jelly-making easier, safer, and more efficient. Below are the must-have items to ensure success.
Cooking Tools
Jelly-making requires precise temperature control and vigorous stirring, so your cookware should be large, heat-resistant, and durable.
✔ Large, heavy-bottomed pot – Prevents scorching and allows jelly to boil evenly. A stainless steel or enamel-coated pot works best. Avoid aluminum, as it can react with acidic ingredients.
✔ Wooden spoon or heat-resistant spatula – Helps stir the jelly without scratching the pot. Wooden spoons are great because they don’t conduct heat.
Candy thermometer – Measures the temperature to ensure the jelly reaches the perfect gel point (220°F or 104°C).
Ladle or funnel – Makes pouring hot jelly into jars less messy and reduces waste.
Timer – Keeps track of boiling time to prevent overcooking or undercooking.
💡 Pro Tip: Never overfill your pot! Jelly expands as it boils, and a full pot can lead to overflow and sticky messes.
Straining Tools
Since plum jelly is meant to be smooth and seed-free, straining the cooked fruit juice is essential.
✔ Jelly bag or fine-mesh sieve – A jelly bag is ideal for extracting clear juice from cooked plums. If you don’t have one, a fine-mesh sieve lined with cheesecloth works as a great alternative.
✔ Cheesecloth or muslin cloth – If using a strainer, double-layered cheesecloth helps catch tiny particles, ensuring a silky-smooth jelly.
✔ Colander – A stainless steel colander helps hold plums while they drain. Avoid plastic, as it can retain flavors and stains.
✔ Bowl or measuring cup – Used for collecting the strained plum juice before cooking it with sugar and pectin.
💡 Pro Tip: Don’t squeeze the jelly bag too much! Let the juice drip naturally to avoid a cloudy jelly.
Sterilizing and Preparing Jars
Properly sterilized jars are crucial to prevent contamination and ensure your plum jelly stays fresh for months. Here’s why and how to do it.
Importance of Sterilization
Kills bacteria and mold spores – Any leftover microbes can spoil your jelly, leading to mold growth or fermentation.
Prevents foodborne illness – A sterilized jar ensures a safe, healthy product.
Improves shelf life – Clean jars seal properly, keeping jelly fresh for up to a year.
💡 Pro Tip: Even if using new jars, always sterilize them before filling to remove dust or residues from manufacturing.
Step-by-Step Sterilization Process
There are two easy methods to sterilize jars:
1. Boiling Water Method (Best for large batches)
1️⃣ Fill a large pot with water and place jars (upright) inside. Ensure the water covers the jars completely.
2️⃣ Bring the water to a rolling boil and let the jars boil for 10 minutes.
3️⃣ Use tongs to carefully remove jars and place them on a clean towel to air dry.
✔ Best for: Large batches of jelly-making and traditional canning.
2. Oven Sterilization Method (Best for small batches)
1️⃣ Preheat your oven to 250°F (120°C).
2️⃣ Place washed jars on a baking tray and heat for 15 minutes.
3️⃣ Remove jars using oven mitts, keeping them hot until ready to use.
✔ Best for: Small jelly batches and quick sterilization.
💡 Pro Tip: Always fill jars while they’re still warm! Pouring hot jelly into cold jars can cause cracking.
Key Takeaways from Part 3
Use the right tools – A large pot, wooden spoon, thermometer, and straining setup make jelly-making easier.
Strain properly – Use a jelly bag or cheesecloth for a clear, smooth jelly.
Sterilization is essential – Prevents spoilage and keeps jelly fresh for months.
Boiling water or oven methods work best for sterilizing jars.
Part 4: Step-by-Step Plum Jelly Recipe
Now that we have our ingredients ready and our equipment set, it’s time for the most exciting part—making the jelly! This process requires careful attention to detail, from extracting the juice to cooking and sealing the jars. But don’t worry! With this step-by-step guide, your plum jelly will turn out perfectly smooth, flavorful, and well-set.
Extracting Plum Juice
The first step in making homemade plum jelly is to extract the juice from fresh plums. This ensures that the jelly has a smooth, seed-free consistency while retaining maximum flavor.
Washing and Preparing Plums
Before cooking, it’s essential to properly clean the plums:
✔ Rinse thoroughly – Plums may have pesticide residue, dust, or natural wax on their skin. Wash them under cold running water.
✔ Remove stems and leaves – Pluck off any remaining stems or leaves, as they can affect the taste of the juice.
✔ Check for bad spots – Discard any rotting or overly bruised plums. Slightly underripe and ripe plums are best.
✔ Cut the plums in half (optional) – If your plums are large, cutting them in half helps release juice more quickly.
💡 Pro Tip: There’s no need to remove the pits at this stage! They add extra natural pectin, helping the jelly set better.
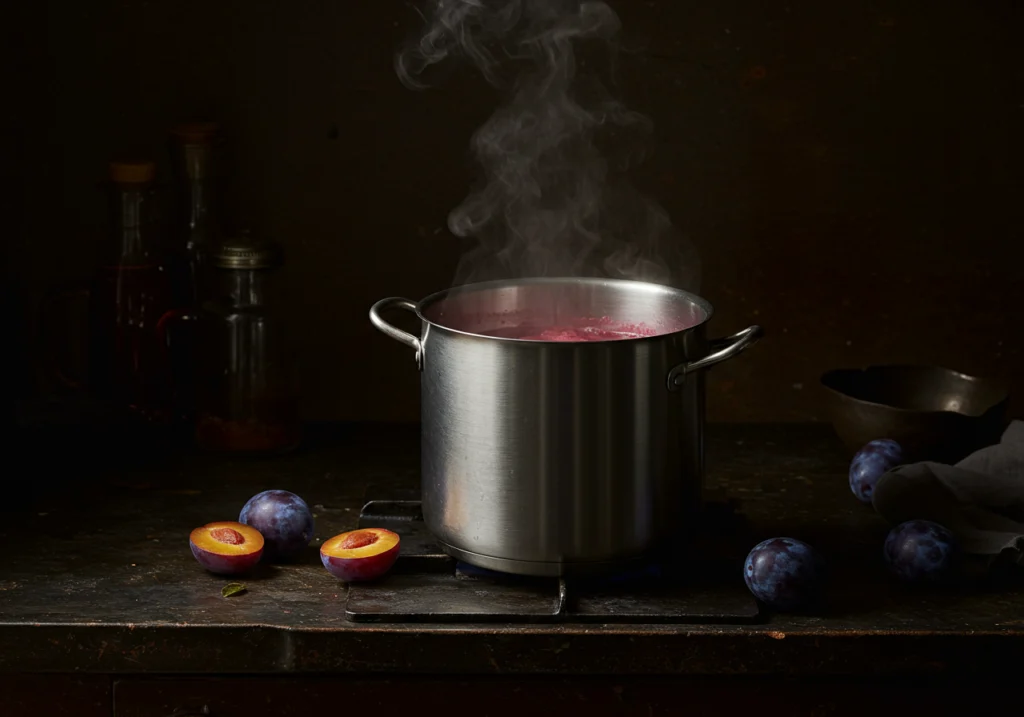
Cooking to Release Juice
Place plums in a large pot – Add just enough water to cover the bottom (about 1/2 cup per pound of plums).
Simmer over medium heat – Heat the plums gently, stirring occasionally.
Mash as they soften – Use a potato masher or spoon to help break down the plums and release their juice.
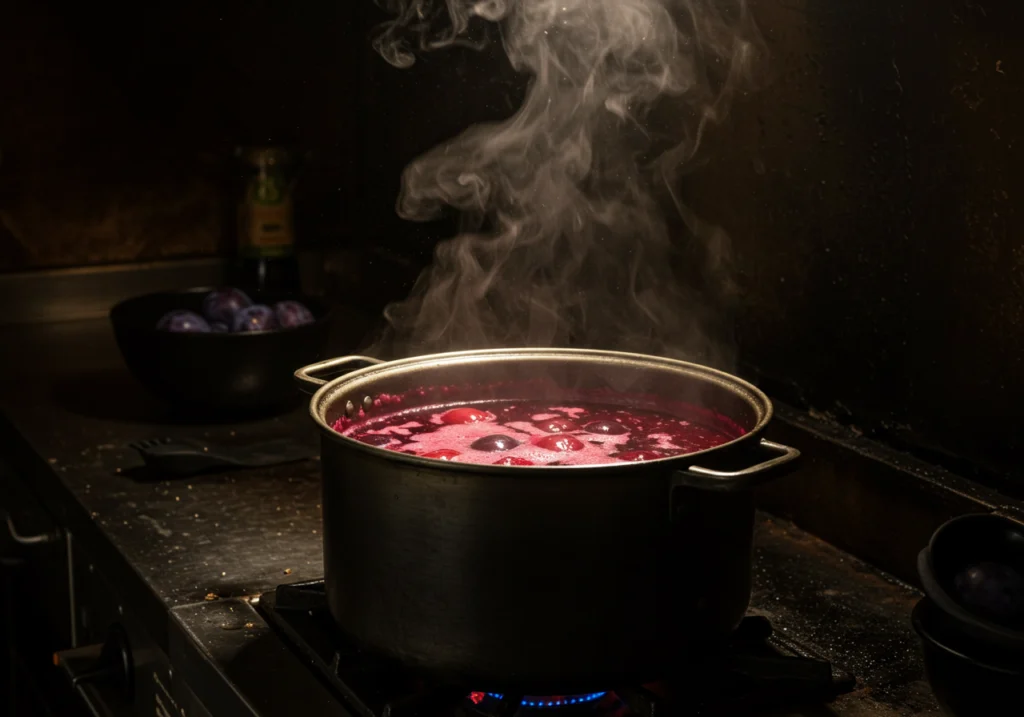
Cook for 15-20 minutes – The plums should become very soft and mushy, and the juice should turn a deep red or purple (depending on the variety of plums used).
💡 Pro Tip: Don’t boil too aggressively, or you’ll break down the pectin, which is needed for proper jelly setting!
Straining the Juice
Once the plums are fully cooked, you’ll need to strain out the solids to obtain a clear juice for your jelly.
Set up a jelly bag or cheesecloth-lined strainer – Place it over a large bowl or measuring cup.
Carefully pour in the cooked plums – Let the juice drip naturally for about 2-3 hours (or overnight for the clearest jelly).
Avoid squeezing the bag – While it’s tempting, squeezing forces tiny pulp particles through, resulting in cloudy jelly.
Measure the juice – You should have about 4 cups of plum juice. If you have more or less, adjust sugar and pectin accordingly.
💡 Pro Tip: If you’re short on time, gently pressing the fruit with a spoon can speed up the process—but don’t overdo it!
Cooking the Jelly
Now that we have our plum juice extracted, it’s time to cook the jelly! This step requires precise ingredient measurements, proper boiling techniques, and testing for the gel point.
Measuring Ingredients Accurately
Getting the right ratio of juice, sugar, and pectin is crucial for achieving the perfect jelly texture.
✔ For every 4 cups of plum juice, use:
- 4 cups of granulated sugar
- 1 package (1.75 oz) of powdered pectin (or follow low-sugar pectin instructions)
- 2 tablespoons fresh lemon juice (helps activate pectin)
💡 Pro Tip: Too much sugar can make the jelly overly stiff, while too little can result in runny jelly.
Combining Juice, Sugar, and Pectin
Mix pectin with plum juice – In a large pot, whisk the pectin into the plum juice before heating.
Bring to a gentle boil – Heat the mixture over medium-high heat, stirring constantly.
Add sugar gradually – Once the juice is warm, slowly add sugar, stirring to dissolve completely.
💡 Pro Tip: Stir continuously to prevent sugar from clumping or sticking to the bottom of the pot.
Achieving the Boil
Turn up the heat – Once sugar is dissolved, increase heat to high.
Boil rapidly for 1-2 minutes – The mixture should bubble vigorously and rise up in the pot.
Watch for thickening – The jelly should begin to cling slightly to the spoon.
💡 Pro Tip: A “rolling boil” means bubbling that doesn’t stop when stirred. This is crucial for proper setting.
Testing for Gel Point
To check if the jelly is ready to set, use these methods:
✔ Spoon Test – Dip a spoon into the jelly, then let it cool for a few seconds. If it coats the back of the spoon and falls off in sheets, it’s ready.
✔ Plate Test – Place a small drop of jelly on a chilled plate. If it wrinkles when pushed with a finger, it’s done.
💡 Pro Tip: If the jelly isn’t setting, continue boiling for another 1-2 minutes and test again.
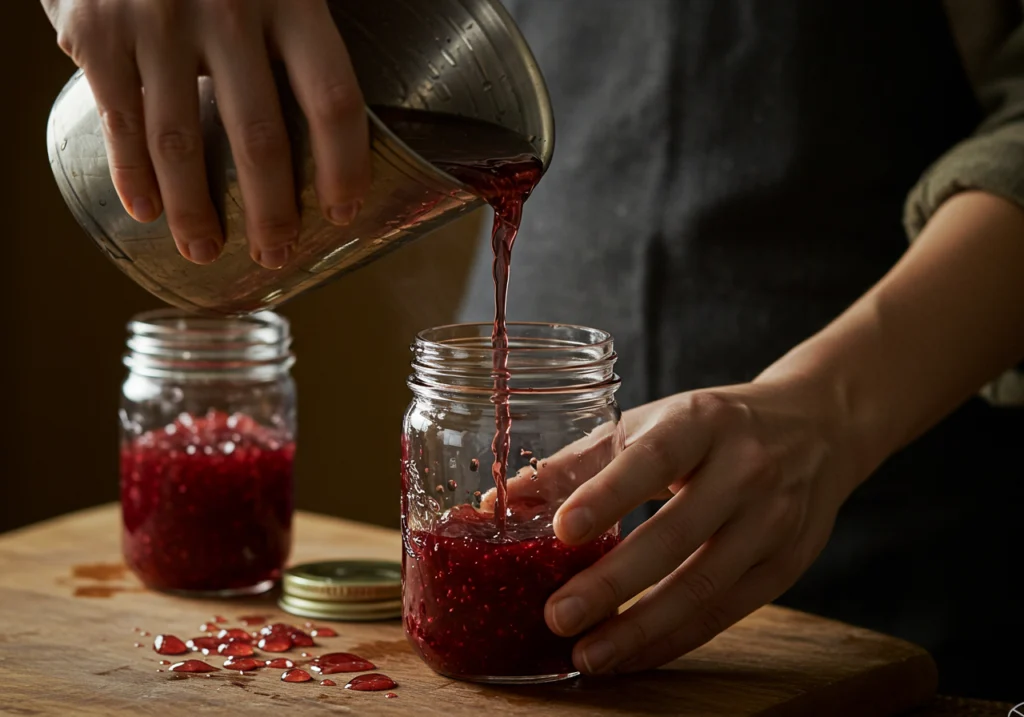
Filling and Sealing Jars
Once your jelly reaches the perfect gel point, it’s time to pour and seal!
Pouring Jelly into Jars
Use a sterilized funnel – This prevents mess and waste.
Fill each jar, leaving 1/4-inch headspace – This space allows for proper sealing.
Remove air bubbles – Run a clean knife or skewer through the jelly to release trapped air.
💡 Pro Tip: Wipe jar rims clean to ensure a tight seal.
Sealing and Processing
Place lids on jars – Ensure they are centered and finger-tightened (not over-tightened).
Process in a boiling water bath for 10 minutes – This ensures jars are properly sealed for long-term storage.
Let cool for 12-24 hours – Place jars on a towel-lined counter, undisturbed, to set.
💡 Pro Tip: Listen for the “pop” sound as jars cool—this means they’ve sealed correctly!
Part 5: Troubleshooting and Tips
Even if you’ve followed the recipe step by step, things don’t always go as planned in the kitchen. Maybe your plum jelly didn’t set, or it looks cloudy instead of clear. But don’t worry—every problem has a solution!
This section will help you identify and fix common issues while also exploring fun variations to enhance your homemade plum jelly. With a few adjustments, you’ll have perfectly set, vibrant, and delicious jelly every time!
Common Jelly Making Issues and Solutions
Jelly Didn’t Set Properly
If your jelly is too runny instead of firm and spreadable, one of these reasons might be to blame:
Not enough pectin – Plums contain natural pectin, but some varieties (like Japanese plums) may need added commercial pectin.
Undercooking – If the jelly didn’t reach the gel point (220°F/104°C), it won’t set properly.
Too much liquid – If your juice-to-sugar ratio was off, the jelly may remain thin.
How to Fix It:
✔ Reboil the jelly – Add one tablespoon of lemon juice and one tablespoon of pectin per cup of jelly. Bring to a rolling boil for 1-2 minutes, then test again.
✔ Use the spoon or plate test – Dip a spoon in the jelly and let it cool slightly. If it thickens on the spoon or wrinkles on a chilled plate, it’s ready!
💡 Pro Tip: If the jelly is still slightly runny but tastes great, use it as a syrup for pancakes or drizzle over ice cream!
Cloudy Jelly
A perfectly made plum jelly should be clear and glossy, but sometimes it turns murky or opaque.
Squeezing the jelly bag – Pressing the fruit forces tiny pulp particles into the juice, making it cloudy.
Overcooking the juice – Cooking the plums for too long can break down natural pectin, releasing unwanted particles.
Improper straining technique – If the strainer or cheesecloth wasn’t fine enough, small fruit solids may have passed through.
How to Fix It:
Let the juice drip naturally through the strainer—patience is key!
Use multiple layers of cheesecloth or a jelly bag for ultra-clear juice.
Avoid stirring too much during boiling, which can introduce air bubbles.
💡 Pro Tip: If the jelly is already cloudy but fully set, don’t worry! It will still taste amazing—it just won’t have that crystal-clear appearance.
Enhancing Flavor and Variations
Want to take your plum jelly to the next level? Adding spices or mixing in other fruits can create exciting new flavors while still keeping that classic jelly texture.
Adding Herbs or Spices
Cinnamon sticks – Adds a warm, comforting note, perfect for fall.
Vanilla bean – Enhances the jelly’s natural sweetness and aroma.
Star anise – Infuses a subtle licorice-like depth.
Ginger – Adds a slight spicy kick, great for pairing with cheese.
💡 How to Do It: Add whole spices while simmering the plum juice, then remove them before straining. For vanilla, stir in pure vanilla extract right before jarring.
Combining Fruits
Plums blend beautifully with other fruits to create unique flavor combinations.
Raspberry – A sweet-tart jelly with a deep red hue.
Peach – A mild, fruity blend that’s smooth and summery.
Apple – Enhances natural pectin levels, helping the jelly set better.
Blackberry – Creates a rich, complex flavor with a dark, glossy finish.
💡 How to Do It: Use a 50/50 mix of plums and another fruit, ensuring you maintain the right balance of sugar, acidity, and pectin for proper setting.
Part 6: Storing and Enjoying Your Plum Jelly
After all the effort put into making the perfect plum jelly, it’s essential to store it correctly to maintain its freshness, flavor, and quality. Proper storage ensures your jelly lasts for months (or even years) without losing its smooth texture and rich taste.
And, of course, plum jelly isn’t just for toast! You can get creative with it, using it in desserts, savory dishes, and even as a gourmet cheese pairing. Let’s explore the best ways to store your jelly and some exciting ways to enjoy it beyond breakfast!
Proper Storage Techniques
Shelf Life of Sealed Jars
If your plum jelly was canned properly using a boiling water bath, it can stay fresh for up to 12-18 months when stored under the right conditions:
✔ Store in a cool, dark place – Keep jars in a pantry, cupboard, or basement away from direct sunlight and heat.
✔ Ensure a proper seal – The lids should be firm and not pop when pressed. If a seal breaks, refrigerate and use within a few weeks.
✔ Label your jars – Write the date of canning to keep track of freshness.
💡 Pro Tip: While sealed jelly remains safe for over a year, the best flavor and texture are usually within 6-12 months of canning.
Refrigeration After Opening
Once you pop open a jar of homemade plum jelly, the clock starts ticking! To keep it fresh and delicious:
Refrigerate immediately – Store opened jelly in the fridge at or below 40°F (4°C).
Use within 3-4 weeks – After opening, plum jelly retains its best flavor for about a month.
Avoid cross-contamination – Always use a clean, dry spoon to scoop jelly and prevent spoilage.
Check for mold or off smells – If the jelly smells fermented or has mold, discard it.
💡 Pro Tip: If you find yourself with too much jelly to use up quickly, freeze small portions in an ice cube tray and thaw as needed!
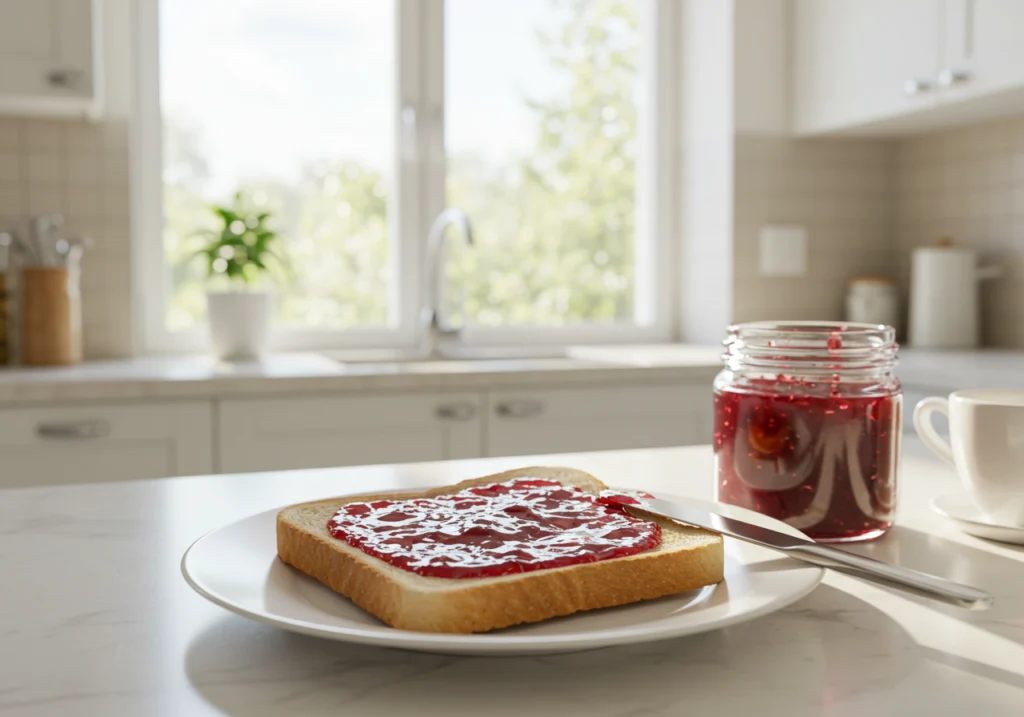
Creative Uses for Plum Jelly
Sure, plum jelly is fantastic on buttered toast or biscuits, but why stop there? Here are some creative ways to use it in both sweet and savory dishes!
Beyond Toast: Unexpected Ways to Use Plum Jelly
Meat Glaze – Brush warm plum jelly over grilled chicken, pork, or turkey for a sweet, caramelized glaze.
Salad Dressing – Whisk with olive oil, vinegar, and Dijon mustard for a fruity vinaigrette.
Dessert Filling – Spoon into thumbprint cookies, crepes, or layered cakes for a delicious twist.
Smoothie Booster – Blend a spoonful into a berry smoothie for extra flavor.
Dipping Sauce – Mix with soy sauce and garlic to create a savory-sweet glaze for stir-fries.
💡 Pro Tip: Melt plum jelly slightly in the microwave for a drizzle-friendly syrup over pancakes or waffles!
Pairing with Cheeses: A Gourmet Touch
Plum jelly pairs beautifully with a variety of cheeses, adding a sweet contrast to rich, creamy flavors.
Brie or Camembert – Spread plum jelly on a warm baked brie for a crowd-pleasing appetizer.
Goat Cheese – Smear on a cracker with tangy goat cheese for a balance of sweet and tart.
Cheddar or Gouda – The fruity brightness cuts through the richness of aged cheese.
Blue Cheese – A bold, funky pairing that enhances the complexity of both flavors.
💡 Pro Tip: Serve plum jelly on a charcuterie board with nuts, fresh fruits, and crackers for a gourmet touch!
Part 7: Frequently Asked Questions About Plum Jelly
Even with a detailed guide, you might still have lingering questions about making, adjusting, or fixing your homemade plum jelly. Whether it’s about substituting ingredients, adjusting sweetness, or setting issues, we’ve got the answers to some of the most common questions.
Can I Use Frozen Plums?
Absolutely! Frozen plums work just as well as fresh ones, but there are a few things to keep in mind.
✔ Thaw before use – Let the plums fully defrost at room temperature or overnight in the fridge.
✔ Retain the juice – As frozen plums thaw, they release extra liquid. Use this in the recipe to enhance flavor.
✔ Check for texture changes – Freezing softens plums, making them slightly mushier than fresh ones, but this won’t affect the jelly’s final texture.
✔ Adjust pectin levels – Some frozen plums may have lost natural pectin, so adding a bit more commercial pectin may help ensure proper setting.
💡 Pro Tip: If using frozen plums, add a little extra lemon juice to help maintain acidity and balance the flavor!
How Do I Fix Overly Sweet Jelly?
If your plum jelly is too sweet, don’t worry—there are ways to balance it out:
Add lemon juice – Stir in 1-2 tablespoons of fresh lemon juice to add brightness and acidity.
Blend with another fruit – Reheat the jelly and mix it with tart fruit juice, like raspberry or cranberry.
Increase salt or spices – A pinch of salt, cinnamon, or ginger can cut through excessive sweetness.
Dilute and reboil – Reheat the jelly with a small amount of unsweetened plum juice, then re-test the gel point.
💡 Pro Tip: Always taste-test before adding sugar in the beginning—it’s easier to add sweetness than to remove it later!
Is Pectin Necessary?
It depends on the type of plums you use and the consistency you want.
Plums naturally contain pectin – If using high-pectin plums (like European varieties), you can often skip commercial pectin and rely on natural pectin.
If using low-pectin plums (like Japanese plums), you may need added pectin to achieve a firm set.
Alternative methods – Some people use green apples, lemon peels, or extra simmering time instead of commercial pectin.
💡 Pro Tip: If you prefer a soft-set jelly, you can omit pectin and cook the jelly longer to naturally thicken it.
Final Thoughts & Next Steps
We’ve covered everything from selecting the right plums to troubleshooting jelly issues and creative uses. Now, you’re fully equipped to make homemade plum jelly like a pro!
If you’re feeling adventurous, experiment with flavors, spices, and fruit blends to create your signature jelly. And don’t forget to store it properly so you can enjoy it for months to come.
Enjoy your delicious, homemade plum jelly, and happy canning! 🍇✨
Part 8: Conclusion
Reflecting on the Jelly-Making Experience
Making homemade plum jelly is more than just a recipe—it’s a rewarding process that combines tradition, creativity, and a little science. From selecting the perfectly ripe plums to watching the jelly transform as it sets, each step has its own magic. The moment you pop open a jar and spread that smooth, glossy jelly on warm toast, you’ll appreciate every bit of effort that went into it.
One of the most valuable lessons I’ve learned in making plum jelly is that every batch is unique. The flavor changes depending on the variety of plums, the amount of sugar, and even how long you simmer the juice. Sometimes the jelly sets perfectly on the first try, and other times, it requires a little adjustment and patience—but that’s part of the fun!
💡 My top tip? Always taste as you go! Balancing acidity, sweetness, and pectin levels makes all the difference between a good jelly and an exceptional one.
Encouragement to Experiment
If there’s one thing I hope you take away from this guide, it’s that jelly-making is highly customizable. There’s no one “perfect” way to make plum jelly—it’s all about personal preference and creativity.
✔ Want a spiced version? Add a cinnamon stick or a touch of vanilla.
✔ Prefer a tangier jelly? Use more lemon juice or blend plums with tart berries.
✔ Love a chunky texture? Skip the straining and turn it into plum preserves instead!
The beauty of homemade preserves is that they allow you to capture the season’s best flavors in a jar. And once you start experimenting, you’ll find endless possibilities for creating your own signature jelly.
So go ahead—get in the kitchen, grab some fresh plums, and start jelly-making with confidence! You might just discover your new favorite recipe along the way. 🍇✨
Final Thoughts & Next Steps
This guide has taken you through every step of the plum jelly-making process, from choosing ingredients to perfecting the set and storing your jelly. Now, it’s your turn to put it all into action!
What’s Next?
Try the classic recipe first, then experiment with new flavors.
Share your homemade plum jelly with friends and family—it makes a great gift!
Keep learning and refining your skills. Every batch teaches you something new!
Thank you for following along, and happy jelly-making! 😊🍇
1 thought on “The Best Plum Jelly Recipe: Easy, Homemade & Delicious”